Vincent Bernat: VXLAN: BGP EVPN with Cumulus Quagga
 VXLAN is an overlay network to encapsulate Ethernet traffic
over an existing (highly available and scalable, possibly the
Internet) IP network while accomodating a very large number of
tenants. It is defined in RFC 7348. For an uncut introduction on
its use with Linux, have a look at my VXLAN & Linux post.
VXLAN is an overlay network to encapsulate Ethernet traffic
over an existing (highly available and scalable, possibly the
Internet) IP network while accomodating a very large number of
tenants. It is defined in RFC 7348. For an uncut introduction on
its use with Linux, have a look at my VXLAN & Linux post.
 In the above example, we have hypervisors hosting a virtual
machines from different tenants. Each virtual machine is given
access to a tenant-specific virtual Ethernet segment. Users are
expecting classic Ethernet segments: no MAC restrictions1,
total control over the IP addressing scheme they use and availability
of multicast.
In the above example, we have hypervisors hosting a virtual
machines from different tenants. Each virtual machine is given
access to a tenant-specific virtual Ethernet segment. Users are
expecting classic Ethernet segments: no MAC restrictions1,
total control over the IP addressing scheme they use and availability
of multicast.
- discovery of other endpoints (VTEPs) sharing the same VXLAN segments, and
- avoidance of BUM frames (broadcast, unknown unicast and multicast) as they have to be forwarded to all VTEPs.
Introduction to BGP EVPN
BGP EVPN (RFC 7432 and draft-ietf-bess-evpn-overlay for its
application to VXLAN) is a standard control protocol to efficiently
solves those two aspects without relying on multicast nor
source-address learning.
BGP EVPN relies on BGP (RFC 4271) and its MP-BGP extensions
(RFC 4760). BGP is the routing protocol powering the
Internet. It is highly scalable and interoperable. It is also
extensible and one of its extension is MP-BGP. This extension can
carry reachability information (NLRI) for multiple protocols (IPv4,
IPv6, L3VPN and in our case EVPN). EVPN is a special family to
advertise MAC addresses and the remote equipments they are attached
to.
There are basically two kinds of reachability information a VTEP sends
through BGP EVPN:
- the VNIs they have interest in (type 3 routes), and
- for each VNI, the local MAC addresses (type 2 routes).
The protocol also covers other aspects of virtual Ethernet segments
(L3 reachability information from ARP/ND caches, MAC mobility and
multi-homing2) but we won t describe them here.
To deploy BGP EVPN, a typical solution is to use several route
reflectors (both for redundancy and scalability), like in the
picture below. Each VTEP opens a BGP session to at least two route
reflectors, sends its information (MACs and VNIs) and receives
others . This reduces the number of BGP sessions to configure.
 Compared to other solutions to deploy VXLAN, BGP EVPN
has three main advantages:
Compared to other solutions to deploy VXLAN, BGP EVPN
has three main advantages:
- interoperability with other vendors (notably Juniper and Cisco),
- proven scalability (a typical BGP routers handle several millions of routes), and
- possibility to enforce fine-grained policies.
On Linux, Cumulus Quagga is a fairly complete implementation of
BGP EVPN (type 3 routes for VTEP discovery, type 2 routes with MAC or
IP addresses, MAC mobility when a host changes from one VTEP to
another one) which requires very little configuration.
This is a fork of Quagga and currently used in Cumulus Linux,
a network operating system based on Debian powering switches from
various brands. At some point, BGP EVPN support will be contributed
back to FRR, a community-maintained fork of Quagga3.
It should be noted the BGP EVPN implementation of Cumulus Quagga
currently only supports IPv4.
Route reflector setup
Before configuring each VTEP, we need to configure two or more route
reflectors. There are many solutions. I will present three of them:
- using Cumulus Quagga,
- using GoBGP, an implementation of BGP in Go,
- using Juniper JunOS.
For reliability purpose, it s possible (and easy) to use one
implementation for some route reflectors and another implementation
for the other ones.
The proposed configurations are quite minimal. However, it is possible
to centralize policies on the route reflectors (e.g. routes tagged
with some community can only be readvertised to some group of VTEPs).
Using Quagga
The configuration is pretty simple. We suppose the configured route
reflector has 203.0.113.254 configured as a loopback IP.
router bgp 65000
  bgp router-id 203.0.113.254
  bgp cluster-id 203.0.113.254
  bgp log-neighbor-changes
  no bgp default ipv4-unicast
  neighbor fabric peer-group
  neighbor fabric remote-as 65000
  neighbor fabric capability extended-nexthop
  neighbor fabric update-source 203.0.113.254
  bgp listen range 203.0.113.0/24 peer-group fabric
  !
  address-family evpn
   neighbor fabric activate
   neighbor fabric route-reflector-client
  exit-address-family
  !
  exit
!
A peer group fabric is defined and we leverage the dynamic neighbor
feature of Cumulus Quagga: we don t have to explicitely define each
neighbor. Any client from 203.0.113.0/24 and presenting itself as
part of AS 65000 can connect. All sent EVPN routes will be accepted
and reflected to the other clients.
You don t need to run Zebra, the route engine talking with the
kernel. Instead, start bgpd with the --no_kernel flag.
Using GoBGP
GoBGP is a clean implementation of BGP in Go4. It exposes an RPC
API for configuration (but accepts a configuration file and comes with
a command-line client).
It doesn t support dynamic neighbors, so you ll have to use the API,
the command-line client or some templating language to automate their
declaration. A configuration with only one neighbor is like this:
global:
  config:
    as: 65000
    router-id: 203.0.113.254
    local-address-list:
      - 203.0.113.254
neighbors:
  - config:
      neighbor-address: 203.0.113.1
      peer-as: 65000
    afi-safis:
      - config:
          afi-safi-name: l2vpn-evpn
    route-reflector:
      config:
        route-reflector-client: true
        route-reflector-cluster-id: 203.0.113.254
More neighbors can be added from the command line:
$ gobgp neighbor add 203.0.113.2 as 65000 \
>         route-reflector-client 203.0.113.254 \
>         --address-family evpn
GoBGP won t try to interact with the kernel which is fine as a route
reflector.
Using Juniper JunOS
A variety of Juniper products can be a BGP route reflector, notably:
- the Juniper QFX51005, a top-of-the-rack switch,
- the Juniper MX2406, a high-range router,
- the Juniper vRR7, a virtual appliance running JunOS without a
data-plane.
The main factor is the CPU and the memory. The QFX5100 is low on
memory and won t support large deployments without some additional
policing.
Here is a configuration similar to the Quagga one:
interfaces
    lo0
        unit 0
            family inet
                address 203.0.113.254/32;


protocols
    bgp
        group fabric
            family evpn
                signaling
                    /* Do not try to install EVPN routes */
                    no-install;


            type internal;
            cluster 203.0.113.254;
            local-address 203.0.113.254;
            allow 203.0.113.0/24;


routing-options
    router-id 203.0.113.254;
    autonomous-system 65000;
VTEP setup
The next step is to configure each VTEP/hypervisor. Each VXLAN is
locally configured using a bridge for local virtual interfaces, like
illustrated in the below schema. The bridge is taking care of the
local MAC addresses (notably, using source-address learning) and the
VXLAN interface takes care of the remote MAC addresses (received with
BGP EVPN).
 VXLANs can be provisioned with the following script. Source-address
learning is disabled as we will rely solely on BGP EVPN to synchronize
FDBs between the hypervisors.
VXLANs can be provisioned with the following script. Source-address
learning is disabled as we will rely solely on BGP EVPN to synchronize
FDBs between the hypervisors.
for vni in 100 200; do
    # Create VXLAN interface
    ip link add vxlan$ vni  type vxlan
        id $ vni  \
        dstport 4789 \
        local 203.0.113.2 \
        nolearning
    # Create companion bridge
    brctl addbr br$ vni
    brctl addif br$ vni  vxlan$ vni
    brctl stp br$ vni  off
    ip link set up dev br$ vni
    ip link set up dev vxlan$ vni
done
# Attach each VM to the appropriate segment
brctl addif br100 vnet10
brctl addif br100 vnet11
brctl addif br200 vnet12
The configuration of Cumulus Quagga is similar to the one used for a
route reflector, except we use the advertise-all-vni directive to
publish all local VNIs.
router bgp 65000
  bgp router-id 203.0.113.2
  no bgp default ipv4-unicast
  neighbor fabric peer-group
  neighbor fabric remote-as 65000
  neighbor fabric capability extended-nexthop
  neighbor fabric update-source dummy0
  ! BGP sessions with route reflectors
  neighbor 203.0.113.253 peer-group fabric
  neighbor 203.0.113.254 peer-group fabric
  !
  address-family evpn
   neighbor fabric activate
   advertise-all-vni
  exit-address-family
  !
  exit
!
If everything works as expected, the instances sharing the same VNI
should be able to ping each other. If IPv6 is enabled on the VMs, the
ping command shows if everything is in order:
$ ping -c10 -w1 -t1 ff02::1%eth0
PING ff02::1%eth0(ff02::1%eth0) 56 data bytes
64 bytes from fe80::5254:33ff:fe00:8%eth0: icmp_seq=1 ttl=64 time=0.016 ms
64 bytes from fe80::5254:33ff:fe00:b%eth0: icmp_seq=1 ttl=64 time=4.98 ms (DUP!)
64 bytes from fe80::5254:33ff:fe00:9%eth0: icmp_seq=1 ttl=64 time=4.99 ms (DUP!)
64 bytes from fe80::5254:33ff:fe00:a%eth0: icmp_seq=1 ttl=64 time=4.99 ms (DUP!)
--- ff02::1%eth0 ping statistics ---
1 packets transmitted, 1 received, +3 duplicates, 0% packet loss, time 0ms
rtt min/avg/max/mdev = 0.016/3.745/4.991/2.152 ms
Verification
Step by step, let s check how everything comes together.
Getting VXLAN information from the kernel
On each VTEP, Quagga should be able to retrieve the information
about configured VXLANs. This can be checked with vtysh:
# show interface vxlan100
Interface vxlan100 is up, line protocol is up
  Link ups:       1    last: 2017/04/29 20:01:33.43
  Link downs:     0    last: (never)
  PTM status: disabled
  vrf: Default-IP-Routing-Table
  index 11 metric 0 mtu 1500
  flags: <UP,BROADCAST,RUNNING,MULTICAST>
  Type: Ethernet
  HWaddr: 62:42:7a:86:44:01
  inet6 fe80::6042:7aff:fe86:4401/64
  Interface Type Vxlan
  VxLAN Id 100
  Access VLAN Id 1
  Master (bridge) ifindex 9 ifp 0x56536e3f3470
The important points are:
- the VNI is 100, and
- the bridge device was correctly detected.
Quagga should also be able to retrieve information about the local
MAC addresses :
# show evpn mac vni 100
Number of MACs (local and remote) known for this VNI: 2
MAC               Type   Intf/Remote VTEP      VLAN
50:54:33:00:00:0a local  eth1.100
50:54:33:00:00:0b local  eth2.100
BGP sessions
Each VTEP has to establish a BGP session to the route reflectors. On
the VTEP, this can be checked by running vtysh:
# show bgp neighbors 203.0.113.254
BGP neighbor is 203.0.113.254, remote AS 65000, local AS 65000, internal link
 Member of peer-group fabric for session parameters
  BGP version 4, remote router ID 203.0.113.254
  BGP state = Established, up for 00:00:45
  Neighbor capabilities:
    4 Byte AS: advertised and received
    AddPath:
      L2VPN EVPN: RX advertised L2VPN EVPN
    Route refresh: advertised and received(new)
    Address family L2VPN EVPN: advertised and received
    Hostname Capability: advertised
    Graceful Restart Capabilty: advertised
[...]
 For address family: L2VPN EVPN
  fabric peer-group member
  Update group 1, subgroup 1
  Packet Queue length 0
  Community attribute sent to this neighbor(both)
  8 accepted prefixes

  Connections established 1; dropped 0
  Last reset never
Local host: 203.0.113.2, Local port: 37603
Foreign host: 203.0.113.254, Foreign port: 179
The output includes the following information:
- the BGP state is
Established,
- the address family
L2VPN EVPN is correctly advertised, and
- 8 routes are received from this route reflector.
The state of the BGP sessions can also be checked from the route
reflectors. With GoBGP, use the following command:
# gobgp neighbor 203.0.113.2
BGP neighbor is 203.0.113.2, remote AS 65000, route-reflector-client
  BGP version 4, remote router ID 203.0.113.2
  BGP state = established, up for 00:04:30
  BGP OutQ = 0, Flops = 0
  Hold time is 9, keepalive interval is 3 seconds
  Configured hold time is 90, keepalive interval is 30 seconds
  Neighbor capabilities:
    multiprotocol:
        l2vpn-evpn:     advertised and received
    route-refresh:      advertised and received
    graceful-restart:   received
    4-octet-as: advertised and received
    add-path:   received
    UnknownCapability(73):      received
    cisco-route-refresh:        received
[...]
  Route statistics:
    Advertised:             8
    Received:               5
    Accepted:               5
With JunOS, use the below command:
> show bgp neighbor 203.0.113.2
Peer: 203.0.113.2+38089 AS 65000 Local: 203.0.113.254+179 AS 65000
  Group: fabric                Routing-Instance: master
  Forwarding routing-instance: master
  Type: Internal    State: Established
  Last State: OpenConfirm   Last Event: RecvKeepAlive
  Last Error: None
  Options: <Preference LocalAddress Cluster AddressFamily Rib-group Refresh>
  Address families configured: evpn
  Local Address: 203.0.113.254 Holdtime: 90 Preference: 170
  NLRI evpn: NoInstallForwarding
  Number of flaps: 0
  Peer ID: 203.0.113.2     Local ID: 203.0.113.254     Active Holdtime: 9
  Keepalive Interval: 3          Group index: 0    Peer index: 2
  I/O Session Thread: bgpio-0 State: Enabled
  BFD: disabled, down
  NLRI for restart configured on peer: evpn
  NLRI advertised by peer: evpn
  NLRI for this session: evpn
  Peer supports Refresh capability (2)
  Stale routes from peer are kept for: 300
  Peer does not support Restarter functionality
  NLRI that restart is negotiated for: evpn
  NLRI of received end-of-rib markers: evpn
  NLRI of all end-of-rib markers sent: evpn
  Peer does not support LLGR Restarter or Receiver functionality
  Peer supports 4 byte AS extension (peer-as 65000)
  NLRI's for which peer can receive multiple paths: evpn
  Table bgp.evpn.0 Bit: 20000
    RIB State: BGP restart is complete
    RIB State: VPN restart is complete
    Send state: in sync
    Active prefixes:              5
    Received prefixes:            5
    Accepted prefixes:            5
    Suppressed due to damping:    0
    Advertised prefixes:          8
  Last traffic (seconds): Received 276  Sent 170  Checked 276
  Input messages:  Total 61     Updates 3       Refreshes 0     Octets 1470
  Output messages: Total 62     Updates 4       Refreshes 0     Octets 1775
  Output Queue[1]: 0            (bgp.evpn.0, evpn)
If a BGP session cannot be established, the logs of each BGP daemon
should mention the cause.
Sent routes
From each VTEP, Quagga needs to send:
- one type 3 route for each local VNI, and
- one type 2 route for each local MAC address.
The best place to check the received routes is on one of the route
reflectors. If you are using JunOS, the following command will display
the received routes from the provided VTEP:
> show route table bgp.evpn.0 receive-protocol bgp 203.0.113.2
bgp.evpn.0: 10 destinations, 10 routes (10 active, 0 holddown, 0 hidden)
  Prefix                  Nexthop              MED     Lclpref    AS path
  2:203.0.113.2:100::0::50:54:33:00:00:0a/304 MAC/IP
*                         203.0.113.2                  100        I
  2:203.0.113.2:100::0::50:54:33:00:00:0b/304 MAC/IP
*                         203.0.113.2                  100        I
  3:203.0.113.2:100::0::203.0.113.2/304 IM
*                         203.0.113.2                  100        I
  3:203.0.113.2:200::0::203.0.113.2/304 IM
*                         203.0.113.2                  100        I
There is one type 3 route for VNI 100 and another one for
VNI 200. There are also two type 2 routes for two MAC addresses on
VNI 100. To get more information, you can add the keyword
extensive. Here is a type 3 route advertising 203.0.113.2 as a
VTEP for VNI 1008:
> show route table bgp.evpn.0 receive-protocol bgp 203.0.113.2 extensive
bgp.evpn.0: 11 destinations, 11 routes (11 active, 0 holddown, 0 hidden)
* 3:203.0.113.2:100::0::203.0.113.2/304 IM (1 entry, 1 announced)
     Accepted
     Route Distinguisher: 203.0.113.2:100
     Nexthop: 203.0.113.2
     Localpref: 100
     AS path: I
     Communities: target:65000:268435556 encapsulation:vxlan(0x8)
[...]
Here is a type 2 route announcing the location of the
50:54:33:00:00:0a MAC address for VNI 100:
> show route table bgp.evpn.0 receive-protocol bgp 203.0.113.2 extensive
bgp.evpn.0: 11 destinations, 11 routes (11 active, 0 holddown, 0 hidden)
* 2:203.0.113.2:100::0::50:54:33:00:00:0a/304 MAC/IP (1 entry, 1 announced)
     Accepted
     Route Distinguisher: 203.0.113.2:100
     Route Label: 100
     ESI: 00:00:00:00:00:00:00:00:00:00
     Nexthop: 203.0.113.2
     Localpref: 100
     AS path: I
     Communities: target:65000:268435556 encapsulation:vxlan(0x8)
[...]
With Quagga, you can get a similar output with vtysh:
# show bgp evpn route
BGP table version is 0, local router ID is 203.0.113.1
Status codes: s suppressed, d damped, h history, * valid, > best, i - internal
Origin codes: i - IGP, e - EGP, ? - incomplete
EVPN type-2 prefix: [2]:[ESI]:[EthTag]:[MAClen]:[MAC]
EVPN type-3 prefix: [3]:[EthTag]:[IPlen]:[OrigIP]
   Network          Next Hop            Metric LocPrf Weight Path
Route Distinguisher: 203.0.113.2:100
*>i[2]:[0]:[0]:[48]:[50:54:33:00:00:0a]
                    203.0.113.2                   100      0 i
*>i[2]:[0]:[0]:[48]:[50:54:33:00:00:0b]
                    203.0.113.2                   100      0 i
*>i[3]:[0]:[32]:[203.0.113.2]
                    203.0.113.2                   100      0 i
Route Distinguisher: 203.0.113.2:200
*>i[3]:[0]:[32]:[203.0.113.2]
                    203.0.113.2                   100      0 i
[...]
With GoBGP, use the following command:
# gobgp global rib -a evpn   grep rd:203.0.113.2:200
    Network  Next Hop             AS_PATH              Age        Attrs
*>  [type:macadv][rd:203.0.113.2:100][esi:single-homed][etag:0][mac:50:54:33:00:00:0a][ip:<nil>][labels:[100]]203.0.113.2                               00:00:17   [ Origin: i   LocalPref: 100   Extcomms: [VXLAN], [65000:268435556] ]
*>  [type:macadv][rd:203.0.113.2:100][esi:single-homed][etag:0][mac:50:54:33:00:00:0b][ip:<nil>][labels:[100]]203.0.113.2                               00:00:17   [ Origin: i   LocalPref: 100   Extcomms: [VXLAN], [65000:268435556] ]
*>  [type:macadv][rd:203.0.113.2:200][esi:single-homed][etag:0][mac:50:54:33:00:00:0a][ip:<nil>][labels:[200]]203.0.113.2                               00:00:17   [ Origin: i   LocalPref: 100   Extcomms: [VXLAN], [65000:268435656] ]
*>  [type:multicast][rd:203.0.113.2:100][etag:0][ip:203.0.113.2]203.0.113.2                               00:00:17   [ Origin: i   LocalPref: 100   Extcomms: [VXLAN], [65000:268435556] ]
*>  [type:multicast][rd:203.0.113.2:200][etag:0][ip:203.0.113.2]203.0.113.2                               00:00:17   [ Origin: i   LocalPref: 100   Extcomms: [VXLAN], [65000:268435656] ]
Received routes
Each VTEP should have received the type 2 and type 3 routes from its
fellow VTEPs, through the route reflectors. You can check with the
show bgp evpn route command of vtysh.
Does Quagga correctly understand the received routes? The type 3
routes are translated to an assocation between the remote VTEPs and
the VNIs:
# show evpn vni
Number of VNIs: 2
VNI        VxLAN IF              VTEP IP         # MACs   # ARPs   Remote VTEPs
100        vxlan100              203.0.113.2     4        0        203.0.113.3
                                                                   203.0.113.1
200        vxlan200              203.0.113.2     3        0        203.0.113.3
                                                                   203.0.113.1
The type 2 routes are translated to an association between the remote
MACs and the remote VTEPs:
# show evpn mac vni 100
Number of MACs (local and remote) known for this VNI: 4
MAC               Type   Intf/Remote VTEP      VLAN
50:54:33:00:00:09 remote 203.0.113.1
50:54:33:00:00:0a local  eth1.100
50:54:33:00:00:0b local  eth2.100
50:54:33:00:00:0c remote 203.0.113.3
FDB configuration
The last step is to ensure Quagga has correctly provided the
received information to the kernel. This can be checked with the
bridge command:
# bridge fdb show dev vxlan100   grep dst
00:00:00:00:00:00 dst 203.0.113.1 self permanent
00:00:00:00:00:00 dst 203.0.113.3 self permanent
50:54:33:00:00:0c dst 203.0.113.3 self
50:54:33:00:00:09 dst 203.0.113.1 self
All good! The two first lines are the translation of the type 3 routes
(any BUM frame will be sent to both 203.0.113.1 and 203.0.113.3)
and the two last ones are the translation of the type 2 routes.
Interoperability
One of the strength of BGP EVPN is the interoperability with other
network vendors. To demonstrate it works as expected, we will
configure a Juniper vMX to act as a VTEP.
First, we need to configure the physical
bridge9. This is similar to the use of ip link and
brctl with Linux. We only configure one physical interface with two
old-school VLANs paired with matching VNIs.
interfaces
    ge-0/0/1
        unit 0
            family bridge
                interface-mode trunk;
                vlan-id-list [ 100 200 ];


routing-instances
    switch
        instance-type virtual-switch;
        interface ge-0/0/1.0;
        bridge-domains
            vlan100
                domain-type bridge;
                vlan-id 100;
                vxlan
                    vni 100;
                    ingress-node-replication;


            vlan200
                domain-type bridge;
                vlan-id 200;
                vxlan
                    vni 200;
                    ingress-node-replication;
Then, we configure BGP EVPN to advertise all known VNIs. The
configuration is quite similar to the one we did with Quagga:
protocols
    bgp
        group fabric
            type internal;
            multihop;
            family evpn signaling;
            local-address 203.0.113.3;
            neighbor 203.0.113.253;
            neighbor 203.0.113.254;


routing-instances
    switch
        vtep-source-interface lo0.0;
        route-distinguisher 203.0.113.3:1; #
        vrf-import EVPN-VRF-VXLAN;
        vrf-target
            target:65000:1;
            auto;

        protocols
            evpn
                encapsulation vxlan;
                extended-vni-list all;
                multicast-mode ingress-replication;


routing-options
    router-id 203.0.113.3;
    autonomous-system 65000;

policy-options
    policy-statement EVPN-VRF-VXLAN
        then accept;
We also need a small compatibility patch for Cumulus
Quagga10.
The routes sent by this configuration are very similar to the routes
sent by Quagga. The main differences are:
- on JunOS, the route distinguisher is configured statically (in ), and
- on JunOS, the VNI is also encoded as an Ethernet tag ID.
Here is a type 3 route, as sent by JunOS:
> show route table bgp.evpn.0 receive-protocol bgp 203.0.113.3 extensive
bgp.evpn.0: 13 destinations, 13 routes (13 active, 0 holddown, 0 hidden)
* 3:203.0.113.3:1::100::203.0.113.3/304 IM (1 entry, 1 announced)
     Accepted
     Route Distinguisher: 203.0.113.3:1
     Nexthop: 203.0.113.3
     Localpref: 100
     AS path: I
     Communities: target:65000:268435556 encapsulation:vxlan(0x8)
     PMSI: Flags 0x0: Label 6: Type INGRESS-REPLICATION 203.0.113.3
[...]
Here is a type 2 route:
> show route table bgp.evpn.0 receive-protocol bgp 203.0.113.3 extensive
bgp.evpn.0: 13 destinations, 13 routes (13 active, 0 holddown, 0 hidden)
* 2:203.0.113.3:1::200::50:54:33:00:00:0f/304 MAC/IP (1 entry, 1 announced)
     Accepted
     Route Distinguisher: 203.0.113.3:1
     Route Label: 200
     ESI: 00:00:00:00:00:00:00:00:00:00
     Nexthop: 203.0.113.3
     Localpref: 100
     AS path: I
     Communities: target:65000:268435656 encapsulation:vxlan(0x8)
[...]
We can check that the vMX is able to make sense of the routes it
receives from its peers running Quagga:
> show evpn database l2-domain-id 100
Instance: switch
VLAN  DomainId  MAC address        Active source                  Timestamp        IP address
     100        50:54:33:00:00:0c  203.0.113.1                    Apr 30 12:46:20
     100        50:54:33:00:00:0d  203.0.113.2                    Apr 30 12:32:42
     100        50:54:33:00:00:0e  203.0.113.2                    Apr 30 12:46:20
     100        50:54:33:00:00:0f  ge-0/0/1.0                     Apr 30 12:45:55
On the other end, if we look at one of the Quagga-based VTEP, we can
check the received routes are correctly understood:
# show evpn vni 100
VNI: 100
 VxLAN interface: vxlan100 ifIndex: 9 VTEP IP: 203.0.113.1
 Remote VTEPs for this VNI:
  203.0.113.3
  203.0.113.2
 Number of MACs (local and remote) known for this VNI: 4
 Number of ARPs (IPv4 and IPv6, local and remote) known for this VNI: 0
# show evpn mac vni 100
Number of MACs (local and remote) known for this VNI: 4
MAC               Type   Intf/Remote VTEP      VLAN
50:54:33:00:00:0c local  eth1.100
50:54:33:00:00:0d remote 203.0.113.2
50:54:33:00:00:0e remote 203.0.113.2
50:54:33:00:00:0f remote 203.0.113.3
Get in touch if you have some success with other vendors!
-
For example, they may use bridges to connect containers
together.
-
Such a feature can replace proprietary
implementations of MC-LAG allowing several VTEPs to act as a
endpoint for a single link aggregation group. This is not needed
on our scenario where hypervisors act as VTEPs.
-
The development of Quagga is slow and closed . New
features are often stalled. FRR is placed under the umbrella of
the Linux Foundation, has a GitHub-centered development model and
an election process. It already has several interesting
enhancements (notably, BGP add-path, BGP unnumbered, MPLS and
LDP).
-
I am unenthusiastic about projects whose the sole purpose is to
rewrite something in Go. However, while being quite young, GoBGP
is quite valuable on its own (good architecture, good
performance).
-
The 48-port version is around $10,000 with the BGP license.
-
An empty chassis with a dual routing engine (RE-S-1800X4-16G) is around $30,000.
-
I don t know how pricey the vRR is. For evaluation purposes,
it can be downloaded for free if you are a customer.
-
The value 100 used in the route distinguishier
(
203.0.113.2:100) is not the one used to encode the VNI. The VNI
is encoded in the route target (65000:268435556), in the 24
least signifiant bits (268435556 & 0xffffff equals 100). As
long as VNIs are unique, we don t have to understand those
details.
-
For some reason, the use of a virtual switch is
mandatory. This is specific to this platform: a QFX doesn t
require this.
-
The encoding of the VNI into the route target is being
standardized in draft-ietf-bess-evpn-overlay. Juniper already
implements this draft.
- using Cumulus Quagga,
- using GoBGP, an implementation of BGP in Go,
- using Juniper JunOS.
Using Quagga
The configuration is pretty simple. We suppose the configured route
reflector has 203.0.113.254 configured as a loopback IP.
router bgp 65000
bgp router-id 203.0.113.254
bgp cluster-id 203.0.113.254
bgp log-neighbor-changes
no bgp default ipv4-unicast
neighbor fabric peer-group
neighbor fabric remote-as 65000
neighbor fabric capability extended-nexthop
neighbor fabric update-source 203.0.113.254
bgp listen range 203.0.113.0/24 peer-group fabric
!
address-family evpn
neighbor fabric activate
neighbor fabric route-reflector-client
exit-address-family
!
exit
!
A peer group fabric is defined and we leverage the dynamic neighbor
feature of Cumulus Quagga: we don t have to explicitely define each
neighbor. Any client from 203.0.113.0/24 and presenting itself as
part of AS 65000 can connect. All sent EVPN routes will be accepted
and reflected to the other clients.
You don t need to run Zebra, the route engine talking with the
kernel. Instead, start bgpd with the --no_kernel flag.
Using GoBGP
GoBGP is a clean implementation of BGP in Go4. It exposes an RPC
API for configuration (but accepts a configuration file and comes with
a command-line client).
It doesn t support dynamic neighbors, so you ll have to use the API,
the command-line client or some templating language to automate their
declaration. A configuration with only one neighbor is like this:
global:
config:
as: 65000
router-id: 203.0.113.254
local-address-list:
- 203.0.113.254
neighbors:
- config:
neighbor-address: 203.0.113.1
peer-as: 65000
afi-safis:
- config:
afi-safi-name: l2vpn-evpn
route-reflector:
config:
route-reflector-client: true
route-reflector-cluster-id: 203.0.113.254
More neighbors can be added from the command line:
$ gobgp neighbor add 203.0.113.2 as 65000 \
> route-reflector-client 203.0.113.254 \
> --address-family evpn
GoBGP won t try to interact with the kernel which is fine as a route
reflector.
Using Juniper JunOS
A variety of Juniper products can be a BGP route reflector, notably:
- the Juniper QFX51005, a top-of-the-rack switch,
- the Juniper MX2406, a high-range router,
- the Juniper vRR7, a virtual appliance running JunOS without a
data-plane.
The main factor is the CPU and the memory. The QFX5100 is low on
memory and won t support large deployments without some additional
policing.
Here is a configuration similar to the Quagga one:
interfaces
lo0
unit 0
family inet
address 203.0.113.254/32;
protocols
bgp
group fabric
family evpn
signaling
/* Do not try to install EVPN routes */
no-install;
type internal;
cluster 203.0.113.254;
local-address 203.0.113.254;
allow 203.0.113.0/24;
routing-options
router-id 203.0.113.254;
autonomous-system 65000;
VTEP setup
The next step is to configure each VTEP/hypervisor. Each VXLAN is
locally configured using a bridge for local virtual interfaces, like
illustrated in the below schema. The bridge is taking care of the
local MAC addresses (notably, using source-address learning) and the
VXLAN interface takes care of the remote MAC addresses (received with
BGP EVPN).
VXLANs can be provisioned with the following script. Source-address
learning is disabled as we will rely solely on BGP EVPN to synchronize
FDBs between the hypervisors.
for vni in 100 200; do
# Create VXLAN interface
ip link add vxlan$ vni type vxlan
id $ vni \
dstport 4789 \
local 203.0.113.2 \
nolearning
# Create companion bridge
brctl addbr br$ vni
brctl addif br$ vni vxlan$ vni
brctl stp br$ vni off
ip link set up dev br$ vni
ip link set up dev vxlan$ vni
done
# Attach each VM to the appropriate segment
brctl addif br100 vnet10
brctl addif br100 vnet11
brctl addif br200 vnet12
The configuration of Cumulus Quagga is similar to the one used for a
route reflector, except we use the advertise-all-vni directive to
publish all local VNIs.
router bgp 65000
bgp router-id 203.0.113.2
no bgp default ipv4-unicast
neighbor fabric peer-group
neighbor fabric remote-as 65000
neighbor fabric capability extended-nexthop
neighbor fabric update-source dummy0
! BGP sessions with route reflectors
neighbor 203.0.113.253 peer-group fabric
neighbor 203.0.113.254 peer-group fabric
!
address-family evpn
neighbor fabric activate
advertise-all-vni
exit-address-family
!
exit
!
If everything works as expected, the instances sharing the same VNI
should be able to ping each other. If IPv6 is enabled on the VMs, the
ping command shows if everything is in order:
$ ping -c10 -w1 -t1 ff02::1%eth0
PING ff02::1%eth0(ff02::1%eth0) 56 data bytes
64 bytes from fe80::5254:33ff:fe00:8%eth0: icmp_seq=1 ttl=64 time=0.016 ms
64 bytes from fe80::5254:33ff:fe00:b%eth0: icmp_seq=1 ttl=64 time=4.98 ms (DUP!)
64 bytes from fe80::5254:33ff:fe00:9%eth0: icmp_seq=1 ttl=64 time=4.99 ms (DUP!)
64 bytes from fe80::5254:33ff:fe00:a%eth0: icmp_seq=1 ttl=64 time=4.99 ms (DUP!)
--- ff02::1%eth0 ping statistics ---
1 packets transmitted, 1 received, +3 duplicates, 0% packet loss, time 0ms
rtt min/avg/max/mdev = 0.016/3.745/4.991/2.152 ms
Verification
Step by step, let s check how everything comes together.
Getting VXLAN information from the kernel
On each VTEP, Quagga should be able to retrieve the information
about configured VXLANs. This can be checked with vtysh:
# show interface vxlan100
Interface vxlan100 is up, line protocol is up
Link ups: 1 last: 2017/04/29 20:01:33.43
Link downs: 0 last: (never)
PTM status: disabled
vrf: Default-IP-Routing-Table
index 11 metric 0 mtu 1500
flags: <UP,BROADCAST,RUNNING,MULTICAST>
Type: Ethernet
HWaddr: 62:42:7a:86:44:01
inet6 fe80::6042:7aff:fe86:4401/64
Interface Type Vxlan
VxLAN Id 100
Access VLAN Id 1
Master (bridge) ifindex 9 ifp 0x56536e3f3470
The important points are:
- the VNI is 100, and
- the bridge device was correctly detected.
Quagga should also be able to retrieve information about the local
MAC addresses :
# show evpn mac vni 100
Number of MACs (local and remote) known for this VNI: 2
MAC Type Intf/Remote VTEP VLAN
50:54:33:00:00:0a local eth1.100
50:54:33:00:00:0b local eth2.100
BGP sessions
Each VTEP has to establish a BGP session to the route reflectors. On
the VTEP, this can be checked by running vtysh:
# show bgp neighbors 203.0.113.254
BGP neighbor is 203.0.113.254, remote AS 65000, local AS 65000, internal link
Member of peer-group fabric for session parameters
BGP version 4, remote router ID 203.0.113.254
BGP state = Established, up for 00:00:45
Neighbor capabilities:
4 Byte AS: advertised and received
AddPath:
L2VPN EVPN: RX advertised L2VPN EVPN
Route refresh: advertised and received(new)
Address family L2VPN EVPN: advertised and received
Hostname Capability: advertised
Graceful Restart Capabilty: advertised
[...]
For address family: L2VPN EVPN
fabric peer-group member
Update group 1, subgroup 1
Packet Queue length 0
Community attribute sent to this neighbor(both)
8 accepted prefixes
Connections established 1; dropped 0
Last reset never
Local host: 203.0.113.2, Local port: 37603
Foreign host: 203.0.113.254, Foreign port: 179
The output includes the following information:
- the BGP state is
Established,
- the address family
L2VPN EVPN is correctly advertised, and
- 8 routes are received from this route reflector.
The state of the BGP sessions can also be checked from the route
reflectors. With GoBGP, use the following command:
# gobgp neighbor 203.0.113.2
BGP neighbor is 203.0.113.2, remote AS 65000, route-reflector-client
BGP version 4, remote router ID 203.0.113.2
BGP state = established, up for 00:04:30
BGP OutQ = 0, Flops = 0
Hold time is 9, keepalive interval is 3 seconds
Configured hold time is 90, keepalive interval is 30 seconds
Neighbor capabilities:
multiprotocol:
l2vpn-evpn: advertised and received
route-refresh: advertised and received
graceful-restart: received
4-octet-as: advertised and received
add-path: received
UnknownCapability(73): received
cisco-route-refresh: received
[...]
Route statistics:
Advertised: 8
Received: 5
Accepted: 5
With JunOS, use the below command:
> show bgp neighbor 203.0.113.2
Peer: 203.0.113.2+38089 AS 65000 Local: 203.0.113.254+179 AS 65000
Group: fabric Routing-Instance: master
Forwarding routing-instance: master
Type: Internal State: Established
Last State: OpenConfirm Last Event: RecvKeepAlive
Last Error: None
Options: <Preference LocalAddress Cluster AddressFamily Rib-group Refresh>
Address families configured: evpn
Local Address: 203.0.113.254 Holdtime: 90 Preference: 170
NLRI evpn: NoInstallForwarding
Number of flaps: 0
Peer ID: 203.0.113.2 Local ID: 203.0.113.254 Active Holdtime: 9
Keepalive Interval: 3 Group index: 0 Peer index: 2
I/O Session Thread: bgpio-0 State: Enabled
BFD: disabled, down
NLRI for restart configured on peer: evpn
NLRI advertised by peer: evpn
NLRI for this session: evpn
Peer supports Refresh capability (2)
Stale routes from peer are kept for: 300
Peer does not support Restarter functionality
NLRI that restart is negotiated for: evpn
NLRI of received end-of-rib markers: evpn
NLRI of all end-of-rib markers sent: evpn
Peer does not support LLGR Restarter or Receiver functionality
Peer supports 4 byte AS extension (peer-as 65000)
NLRI's for which peer can receive multiple paths: evpn
Table bgp.evpn.0 Bit: 20000
RIB State: BGP restart is complete
RIB State: VPN restart is complete
Send state: in sync
Active prefixes: 5
Received prefixes: 5
Accepted prefixes: 5
Suppressed due to damping: 0
Advertised prefixes: 8
Last traffic (seconds): Received 276 Sent 170 Checked 276
Input messages: Total 61 Updates 3 Refreshes 0 Octets 1470
Output messages: Total 62 Updates 4 Refreshes 0 Octets 1775
Output Queue[1]: 0 (bgp.evpn.0, evpn)
If a BGP session cannot be established, the logs of each BGP daemon
should mention the cause.
Sent routes
From each VTEP, Quagga needs to send:
- one type 3 route for each local VNI, and
- one type 2 route for each local MAC address.
The best place to check the received routes is on one of the route
reflectors. If you are using JunOS, the following command will display
the received routes from the provided VTEP:
> show route table bgp.evpn.0 receive-protocol bgp 203.0.113.2
bgp.evpn.0: 10 destinations, 10 routes (10 active, 0 holddown, 0 hidden)
Prefix Nexthop MED Lclpref AS path
2:203.0.113.2:100::0::50:54:33:00:00:0a/304 MAC/IP
* 203.0.113.2 100 I
2:203.0.113.2:100::0::50:54:33:00:00:0b/304 MAC/IP
* 203.0.113.2 100 I
3:203.0.113.2:100::0::203.0.113.2/304 IM
* 203.0.113.2 100 I
3:203.0.113.2:200::0::203.0.113.2/304 IM
* 203.0.113.2 100 I
There is one type 3 route for VNI 100 and another one for
VNI 200. There are also two type 2 routes for two MAC addresses on
VNI 100. To get more information, you can add the keyword
extensive. Here is a type 3 route advertising 203.0.113.2 as a
VTEP for VNI 1008:
> show route table bgp.evpn.0 receive-protocol bgp 203.0.113.2 extensive
bgp.evpn.0: 11 destinations, 11 routes (11 active, 0 holddown, 0 hidden)
* 3:203.0.113.2:100::0::203.0.113.2/304 IM (1 entry, 1 announced)
Accepted
Route Distinguisher: 203.0.113.2:100
Nexthop: 203.0.113.2
Localpref: 100
AS path: I
Communities: target:65000:268435556 encapsulation:vxlan(0x8)
[...]
Here is a type 2 route announcing the location of the
50:54:33:00:00:0a MAC address for VNI 100:
> show route table bgp.evpn.0 receive-protocol bgp 203.0.113.2 extensive
bgp.evpn.0: 11 destinations, 11 routes (11 active, 0 holddown, 0 hidden)
* 2:203.0.113.2:100::0::50:54:33:00:00:0a/304 MAC/IP (1 entry, 1 announced)
Accepted
Route Distinguisher: 203.0.113.2:100
Route Label: 100
ESI: 00:00:00:00:00:00:00:00:00:00
Nexthop: 203.0.113.2
Localpref: 100
AS path: I
Communities: target:65000:268435556 encapsulation:vxlan(0x8)
[...]
With Quagga, you can get a similar output with vtysh:
# show bgp evpn route
BGP table version is 0, local router ID is 203.0.113.1
Status codes: s suppressed, d damped, h history, * valid, > best, i - internal
Origin codes: i - IGP, e - EGP, ? - incomplete
EVPN type-2 prefix: [2]:[ESI]:[EthTag]:[MAClen]:[MAC]
EVPN type-3 prefix: [3]:[EthTag]:[IPlen]:[OrigIP]
Network Next Hop Metric LocPrf Weight Path
Route Distinguisher: 203.0.113.2:100
*>i[2]:[0]:[0]:[48]:[50:54:33:00:00:0a]
203.0.113.2 100 0 i
*>i[2]:[0]:[0]:[48]:[50:54:33:00:00:0b]
203.0.113.2 100 0 i
*>i[3]:[0]:[32]:[203.0.113.2]
203.0.113.2 100 0 i
Route Distinguisher: 203.0.113.2:200
*>i[3]:[0]:[32]:[203.0.113.2]
203.0.113.2 100 0 i
[...]
With GoBGP, use the following command:
# gobgp global rib -a evpn grep rd:203.0.113.2:200
Network Next Hop AS_PATH Age Attrs
*> [type:macadv][rd:203.0.113.2:100][esi:single-homed][etag:0][mac:50:54:33:00:00:0a][ip:<nil>][labels:[100]]203.0.113.2 00:00:17 [ Origin: i LocalPref: 100 Extcomms: [VXLAN], [65000:268435556] ]
*> [type:macadv][rd:203.0.113.2:100][esi:single-homed][etag:0][mac:50:54:33:00:00:0b][ip:<nil>][labels:[100]]203.0.113.2 00:00:17 [ Origin: i LocalPref: 100 Extcomms: [VXLAN], [65000:268435556] ]
*> [type:macadv][rd:203.0.113.2:200][esi:single-homed][etag:0][mac:50:54:33:00:00:0a][ip:<nil>][labels:[200]]203.0.113.2 00:00:17 [ Origin: i LocalPref: 100 Extcomms: [VXLAN], [65000:268435656] ]
*> [type:multicast][rd:203.0.113.2:100][etag:0][ip:203.0.113.2]203.0.113.2 00:00:17 [ Origin: i LocalPref: 100 Extcomms: [VXLAN], [65000:268435556] ]
*> [type:multicast][rd:203.0.113.2:200][etag:0][ip:203.0.113.2]203.0.113.2 00:00:17 [ Origin: i LocalPref: 100 Extcomms: [VXLAN], [65000:268435656] ]
Received routes
Each VTEP should have received the type 2 and type 3 routes from its
fellow VTEPs, through the route reflectors. You can check with the
show bgp evpn route command of vtysh.
Does Quagga correctly understand the received routes? The type 3
routes are translated to an assocation between the remote VTEPs and
the VNIs:
# show evpn vni
Number of VNIs: 2
VNI VxLAN IF VTEP IP # MACs # ARPs Remote VTEPs
100 vxlan100 203.0.113.2 4 0 203.0.113.3
203.0.113.1
200 vxlan200 203.0.113.2 3 0 203.0.113.3
203.0.113.1
The type 2 routes are translated to an association between the remote
MACs and the remote VTEPs:
# show evpn mac vni 100
Number of MACs (local and remote) known for this VNI: 4
MAC Type Intf/Remote VTEP VLAN
50:54:33:00:00:09 remote 203.0.113.1
50:54:33:00:00:0a local eth1.100
50:54:33:00:00:0b local eth2.100
50:54:33:00:00:0c remote 203.0.113.3
FDB configuration
The last step is to ensure Quagga has correctly provided the
received information to the kernel. This can be checked with the
bridge command:
# bridge fdb show dev vxlan100 grep dst
00:00:00:00:00:00 dst 203.0.113.1 self permanent
00:00:00:00:00:00 dst 203.0.113.3 self permanent
50:54:33:00:00:0c dst 203.0.113.3 self
50:54:33:00:00:09 dst 203.0.113.1 self
All good! The two first lines are the translation of the type 3 routes
(any BUM frame will be sent to both 203.0.113.1 and 203.0.113.3)
and the two last ones are the translation of the type 2 routes.
Interoperability
One of the strength of BGP EVPN is the interoperability with other
network vendors. To demonstrate it works as expected, we will
configure a Juniper vMX to act as a VTEP.
First, we need to configure the physical
bridge9. This is similar to the use of ip link and
brctl with Linux. We only configure one physical interface with two
old-school VLANs paired with matching VNIs.
interfaces
ge-0/0/1
unit 0
family bridge
interface-mode trunk;
vlan-id-list [ 100 200 ];
routing-instances
switch
instance-type virtual-switch;
interface ge-0/0/1.0;
bridge-domains
vlan100
domain-type bridge;
vlan-id 100;
vxlan
vni 100;
ingress-node-replication;
vlan200
domain-type bridge;
vlan-id 200;
vxlan
vni 200;
ingress-node-replication;
Then, we configure BGP EVPN to advertise all known VNIs. The
configuration is quite similar to the one we did with Quagga:
protocols
bgp
group fabric
type internal;
multihop;
family evpn signaling;
local-address 203.0.113.3;
neighbor 203.0.113.253;
neighbor 203.0.113.254;
routing-instances
switch
vtep-source-interface lo0.0;
route-distinguisher 203.0.113.3:1; #
vrf-import EVPN-VRF-VXLAN;
vrf-target
target:65000:1;
auto;
protocols
evpn
encapsulation vxlan;
extended-vni-list all;
multicast-mode ingress-replication;
routing-options
router-id 203.0.113.3;
autonomous-system 65000;
policy-options
policy-statement EVPN-VRF-VXLAN
then accept;
We also need a small compatibility patch for Cumulus
Quagga10.
The routes sent by this configuration are very similar to the routes
sent by Quagga. The main differences are:
- on JunOS, the route distinguisher is configured statically (in ), and
- on JunOS, the VNI is also encoded as an Ethernet tag ID.
Here is a type 3 route, as sent by JunOS:
> show route table bgp.evpn.0 receive-protocol bgp 203.0.113.3 extensive
bgp.evpn.0: 13 destinations, 13 routes (13 active, 0 holddown, 0 hidden)
* 3:203.0.113.3:1::100::203.0.113.3/304 IM (1 entry, 1 announced)
Accepted
Route Distinguisher: 203.0.113.3:1
Nexthop: 203.0.113.3
Localpref: 100
AS path: I
Communities: target:65000:268435556 encapsulation:vxlan(0x8)
PMSI: Flags 0x0: Label 6: Type INGRESS-REPLICATION 203.0.113.3
[...]
Here is a type 2 route:
> show route table bgp.evpn.0 receive-protocol bgp 203.0.113.3 extensive
bgp.evpn.0: 13 destinations, 13 routes (13 active, 0 holddown, 0 hidden)
* 2:203.0.113.3:1::200::50:54:33:00:00:0f/304 MAC/IP (1 entry, 1 announced)
Accepted
Route Distinguisher: 203.0.113.3:1
Route Label: 200
ESI: 00:00:00:00:00:00:00:00:00:00
Nexthop: 203.0.113.3
Localpref: 100
AS path: I
Communities: target:65000:268435656 encapsulation:vxlan(0x8)
[...]
We can check that the vMX is able to make sense of the routes it
receives from its peers running Quagga:
> show evpn database l2-domain-id 100
Instance: switch
VLAN DomainId MAC address Active source Timestamp IP address
100 50:54:33:00:00:0c 203.0.113.1 Apr 30 12:46:20
100 50:54:33:00:00:0d 203.0.113.2 Apr 30 12:32:42
100 50:54:33:00:00:0e 203.0.113.2 Apr 30 12:46:20
100 50:54:33:00:00:0f ge-0/0/1.0 Apr 30 12:45:55
On the other end, if we look at one of the Quagga-based VTEP, we can
check the received routes are correctly understood:
# show evpn vni 100
VNI: 100
VxLAN interface: vxlan100 ifIndex: 9 VTEP IP: 203.0.113.1
Remote VTEPs for this VNI:
203.0.113.3
203.0.113.2
Number of MACs (local and remote) known for this VNI: 4
Number of ARPs (IPv4 and IPv6, local and remote) known for this VNI: 0
# show evpn mac vni 100
Number of MACs (local and remote) known for this VNI: 4
MAC Type Intf/Remote VTEP VLAN
50:54:33:00:00:0c local eth1.100
50:54:33:00:00:0d remote 203.0.113.2
50:54:33:00:00:0e remote 203.0.113.2
50:54:33:00:00:0f remote 203.0.113.3
Get in touch if you have some success with other vendors!
-
For example, they may use bridges to connect containers
together.
-
Such a feature can replace proprietary
implementations of MC-LAG allowing several VTEPs to act as a
endpoint for a single link aggregation group. This is not needed
on our scenario where hypervisors act as VTEPs.
-
The development of Quagga is slow and closed . New
features are often stalled. FRR is placed under the umbrella of
the Linux Foundation, has a GitHub-centered development model and
an election process. It already has several interesting
enhancements (notably, BGP add-path, BGP unnumbered, MPLS and
LDP).
-
I am unenthusiastic about projects whose the sole purpose is to
rewrite something in Go. However, while being quite young, GoBGP
is quite valuable on its own (good architecture, good
performance).
-
The 48-port version is around $10,000 with the BGP license.
-
An empty chassis with a dual routing engine (RE-S-1800X4-16G) is around $30,000.
-
I don t know how pricey the vRR is. For evaluation purposes,
it can be downloaded for free if you are a customer.
-
The value 100 used in the route distinguishier
(
203.0.113.2:100) is not the one used to encode the VNI. The VNI
is encoded in the route target (65000:268435556), in the 24
least signifiant bits (268435556 & 0xffffff equals 100). As
long as VNIs are unique, we don t have to understand those
details.
-
For some reason, the use of a virtual switch is
mandatory. This is specific to this platform: a QFX doesn t
require this.
-
The encoding of the VNI into the route target is being
standardized in draft-ietf-bess-evpn-overlay. Juniper already
implements this draft.
router bgp 65000 bgp router-id 203.0.113.254 bgp cluster-id 203.0.113.254 bgp log-neighbor-changes no bgp default ipv4-unicast neighbor fabric peer-group neighbor fabric remote-as 65000 neighbor fabric capability extended-nexthop neighbor fabric update-source 203.0.113.254 bgp listen range 203.0.113.0/24 peer-group fabric ! address-family evpn neighbor fabric activate neighbor fabric route-reflector-client exit-address-family ! exit !
global: config: as: 65000 router-id: 203.0.113.254 local-address-list: - 203.0.113.254 neighbors: - config: neighbor-address: 203.0.113.1 peer-as: 65000 afi-safis: - config: afi-safi-name: l2vpn-evpn route-reflector: config: route-reflector-client: true route-reflector-cluster-id: 203.0.113.254
$ gobgp neighbor add 203.0.113.2 as 65000 \ > route-reflector-client 203.0.113.254 \ > --address-family evpn
Using Juniper JunOS
A variety of Juniper products can be a BGP route reflector, notably:
- the Juniper QFX51005, a top-of-the-rack switch,
- the Juniper MX2406, a high-range router,
- the Juniper vRR7, a virtual appliance running JunOS without a
data-plane.
The main factor is the CPU and the memory. The QFX5100 is low on
memory and won t support large deployments without some additional
policing.
Here is a configuration similar to the Quagga one:
interfaces
lo0
unit 0
family inet
address 203.0.113.254/32;
protocols
bgp
group fabric
family evpn
signaling
/* Do not try to install EVPN routes */
no-install;
type internal;
cluster 203.0.113.254;
local-address 203.0.113.254;
allow 203.0.113.0/24;
routing-options
router-id 203.0.113.254;
autonomous-system 65000;
VTEP setup
The next step is to configure each VTEP/hypervisor. Each VXLAN is
locally configured using a bridge for local virtual interfaces, like
illustrated in the below schema. The bridge is taking care of the
local MAC addresses (notably, using source-address learning) and the
VXLAN interface takes care of the remote MAC addresses (received with
BGP EVPN).
VXLANs can be provisioned with the following script. Source-address
learning is disabled as we will rely solely on BGP EVPN to synchronize
FDBs between the hypervisors.
for vni in 100 200; do
# Create VXLAN interface
ip link add vxlan$ vni type vxlan
id $ vni \
dstport 4789 \
local 203.0.113.2 \
nolearning
# Create companion bridge
brctl addbr br$ vni
brctl addif br$ vni vxlan$ vni
brctl stp br$ vni off
ip link set up dev br$ vni
ip link set up dev vxlan$ vni
done
# Attach each VM to the appropriate segment
brctl addif br100 vnet10
brctl addif br100 vnet11
brctl addif br200 vnet12
The configuration of Cumulus Quagga is similar to the one used for a
route reflector, except we use the advertise-all-vni directive to
publish all local VNIs.
router bgp 65000
bgp router-id 203.0.113.2
no bgp default ipv4-unicast
neighbor fabric peer-group
neighbor fabric remote-as 65000
neighbor fabric capability extended-nexthop
neighbor fabric update-source dummy0
! BGP sessions with route reflectors
neighbor 203.0.113.253 peer-group fabric
neighbor 203.0.113.254 peer-group fabric
!
address-family evpn
neighbor fabric activate
advertise-all-vni
exit-address-family
!
exit
!
If everything works as expected, the instances sharing the same VNI
should be able to ping each other. If IPv6 is enabled on the VMs, the
ping command shows if everything is in order:
$ ping -c10 -w1 -t1 ff02::1%eth0
PING ff02::1%eth0(ff02::1%eth0) 56 data bytes
64 bytes from fe80::5254:33ff:fe00:8%eth0: icmp_seq=1 ttl=64 time=0.016 ms
64 bytes from fe80::5254:33ff:fe00:b%eth0: icmp_seq=1 ttl=64 time=4.98 ms (DUP!)
64 bytes from fe80::5254:33ff:fe00:9%eth0: icmp_seq=1 ttl=64 time=4.99 ms (DUP!)
64 bytes from fe80::5254:33ff:fe00:a%eth0: icmp_seq=1 ttl=64 time=4.99 ms (DUP!)
--- ff02::1%eth0 ping statistics ---
1 packets transmitted, 1 received, +3 duplicates, 0% packet loss, time 0ms
rtt min/avg/max/mdev = 0.016/3.745/4.991/2.152 ms
Verification
Step by step, let s check how everything comes together.
Getting VXLAN information from the kernel
On each VTEP, Quagga should be able to retrieve the information
about configured VXLANs. This can be checked with vtysh:
# show interface vxlan100
Interface vxlan100 is up, line protocol is up
Link ups: 1 last: 2017/04/29 20:01:33.43
Link downs: 0 last: (never)
PTM status: disabled
vrf: Default-IP-Routing-Table
index 11 metric 0 mtu 1500
flags: <UP,BROADCAST,RUNNING,MULTICAST>
Type: Ethernet
HWaddr: 62:42:7a:86:44:01
inet6 fe80::6042:7aff:fe86:4401/64
Interface Type Vxlan
VxLAN Id 100
Access VLAN Id 1
Master (bridge) ifindex 9 ifp 0x56536e3f3470
The important points are:
- the VNI is 100, and
- the bridge device was correctly detected.
Quagga should also be able to retrieve information about the local
MAC addresses :
# show evpn mac vni 100
Number of MACs (local and remote) known for this VNI: 2
MAC Type Intf/Remote VTEP VLAN
50:54:33:00:00:0a local eth1.100
50:54:33:00:00:0b local eth2.100
BGP sessions
Each VTEP has to establish a BGP session to the route reflectors. On
the VTEP, this can be checked by running vtysh:
# show bgp neighbors 203.0.113.254
BGP neighbor is 203.0.113.254, remote AS 65000, local AS 65000, internal link
Member of peer-group fabric for session parameters
BGP version 4, remote router ID 203.0.113.254
BGP state = Established, up for 00:00:45
Neighbor capabilities:
4 Byte AS: advertised and received
AddPath:
L2VPN EVPN: RX advertised L2VPN EVPN
Route refresh: advertised and received(new)
Address family L2VPN EVPN: advertised and received
Hostname Capability: advertised
Graceful Restart Capabilty: advertised
[...]
For address family: L2VPN EVPN
fabric peer-group member
Update group 1, subgroup 1
Packet Queue length 0
Community attribute sent to this neighbor(both)
8 accepted prefixes
Connections established 1; dropped 0
Last reset never
Local host: 203.0.113.2, Local port: 37603
Foreign host: 203.0.113.254, Foreign port: 179
The output includes the following information:
- the BGP state is
Established,
- the address family
L2VPN EVPN is correctly advertised, and
- 8 routes are received from this route reflector.
The state of the BGP sessions can also be checked from the route
reflectors. With GoBGP, use the following command:
# gobgp neighbor 203.0.113.2
BGP neighbor is 203.0.113.2, remote AS 65000, route-reflector-client
BGP version 4, remote router ID 203.0.113.2
BGP state = established, up for 00:04:30
BGP OutQ = 0, Flops = 0
Hold time is 9, keepalive interval is 3 seconds
Configured hold time is 90, keepalive interval is 30 seconds
Neighbor capabilities:
multiprotocol:
l2vpn-evpn: advertised and received
route-refresh: advertised and received
graceful-restart: received
4-octet-as: advertised and received
add-path: received
UnknownCapability(73): received
cisco-route-refresh: received
[...]
Route statistics:
Advertised: 8
Received: 5
Accepted: 5
With JunOS, use the below command:
> show bgp neighbor 203.0.113.2
Peer: 203.0.113.2+38089 AS 65000 Local: 203.0.113.254+179 AS 65000
Group: fabric Routing-Instance: master
Forwarding routing-instance: master
Type: Internal State: Established
Last State: OpenConfirm Last Event: RecvKeepAlive
Last Error: None
Options: <Preference LocalAddress Cluster AddressFamily Rib-group Refresh>
Address families configured: evpn
Local Address: 203.0.113.254 Holdtime: 90 Preference: 170
NLRI evpn: NoInstallForwarding
Number of flaps: 0
Peer ID: 203.0.113.2 Local ID: 203.0.113.254 Active Holdtime: 9
Keepalive Interval: 3 Group index: 0 Peer index: 2
I/O Session Thread: bgpio-0 State: Enabled
BFD: disabled, down
NLRI for restart configured on peer: evpn
NLRI advertised by peer: evpn
NLRI for this session: evpn
Peer supports Refresh capability (2)
Stale routes from peer are kept for: 300
Peer does not support Restarter functionality
NLRI that restart is negotiated for: evpn
NLRI of received end-of-rib markers: evpn
NLRI of all end-of-rib markers sent: evpn
Peer does not support LLGR Restarter or Receiver functionality
Peer supports 4 byte AS extension (peer-as 65000)
NLRI's for which peer can receive multiple paths: evpn
Table bgp.evpn.0 Bit: 20000
RIB State: BGP restart is complete
RIB State: VPN restart is complete
Send state: in sync
Active prefixes: 5
Received prefixes: 5
Accepted prefixes: 5
Suppressed due to damping: 0
Advertised prefixes: 8
Last traffic (seconds): Received 276 Sent 170 Checked 276
Input messages: Total 61 Updates 3 Refreshes 0 Octets 1470
Output messages: Total 62 Updates 4 Refreshes 0 Octets 1775
Output Queue[1]: 0 (bgp.evpn.0, evpn)
If a BGP session cannot be established, the logs of each BGP daemon
should mention the cause.
Sent routes
From each VTEP, Quagga needs to send:
- one type 3 route for each local VNI, and
- one type 2 route for each local MAC address.
The best place to check the received routes is on one of the route
reflectors. If you are using JunOS, the following command will display
the received routes from the provided VTEP:
> show route table bgp.evpn.0 receive-protocol bgp 203.0.113.2
bgp.evpn.0: 10 destinations, 10 routes (10 active, 0 holddown, 0 hidden)
Prefix Nexthop MED Lclpref AS path
2:203.0.113.2:100::0::50:54:33:00:00:0a/304 MAC/IP
* 203.0.113.2 100 I
2:203.0.113.2:100::0::50:54:33:00:00:0b/304 MAC/IP
* 203.0.113.2 100 I
3:203.0.113.2:100::0::203.0.113.2/304 IM
* 203.0.113.2 100 I
3:203.0.113.2:200::0::203.0.113.2/304 IM
* 203.0.113.2 100 I
There is one type 3 route for VNI 100 and another one for
VNI 200. There are also two type 2 routes for two MAC addresses on
VNI 100. To get more information, you can add the keyword
extensive. Here is a type 3 route advertising 203.0.113.2 as a
VTEP for VNI 1008:
> show route table bgp.evpn.0 receive-protocol bgp 203.0.113.2 extensive
bgp.evpn.0: 11 destinations, 11 routes (11 active, 0 holddown, 0 hidden)
* 3:203.0.113.2:100::0::203.0.113.2/304 IM (1 entry, 1 announced)
Accepted
Route Distinguisher: 203.0.113.2:100
Nexthop: 203.0.113.2
Localpref: 100
AS path: I
Communities: target:65000:268435556 encapsulation:vxlan(0x8)
[...]
Here is a type 2 route announcing the location of the
50:54:33:00:00:0a MAC address for VNI 100:
> show route table bgp.evpn.0 receive-protocol bgp 203.0.113.2 extensive
bgp.evpn.0: 11 destinations, 11 routes (11 active, 0 holddown, 0 hidden)
* 2:203.0.113.2:100::0::50:54:33:00:00:0a/304 MAC/IP (1 entry, 1 announced)
Accepted
Route Distinguisher: 203.0.113.2:100
Route Label: 100
ESI: 00:00:00:00:00:00:00:00:00:00
Nexthop: 203.0.113.2
Localpref: 100
AS path: I
Communities: target:65000:268435556 encapsulation:vxlan(0x8)
[...]
With Quagga, you can get a similar output with vtysh:
# show bgp evpn route
BGP table version is 0, local router ID is 203.0.113.1
Status codes: s suppressed, d damped, h history, * valid, > best, i - internal
Origin codes: i - IGP, e - EGP, ? - incomplete
EVPN type-2 prefix: [2]:[ESI]:[EthTag]:[MAClen]:[MAC]
EVPN type-3 prefix: [3]:[EthTag]:[IPlen]:[OrigIP]
Network Next Hop Metric LocPrf Weight Path
Route Distinguisher: 203.0.113.2:100
*>i[2]:[0]:[0]:[48]:[50:54:33:00:00:0a]
203.0.113.2 100 0 i
*>i[2]:[0]:[0]:[48]:[50:54:33:00:00:0b]
203.0.113.2 100 0 i
*>i[3]:[0]:[32]:[203.0.113.2]
203.0.113.2 100 0 i
Route Distinguisher: 203.0.113.2:200
*>i[3]:[0]:[32]:[203.0.113.2]
203.0.113.2 100 0 i
[...]
With GoBGP, use the following command:
# gobgp global rib -a evpn grep rd:203.0.113.2:200
Network Next Hop AS_PATH Age Attrs
*> [type:macadv][rd:203.0.113.2:100][esi:single-homed][etag:0][mac:50:54:33:00:00:0a][ip:<nil>][labels:[100]]203.0.113.2 00:00:17 [ Origin: i LocalPref: 100 Extcomms: [VXLAN], [65000:268435556] ]
*> [type:macadv][rd:203.0.113.2:100][esi:single-homed][etag:0][mac:50:54:33:00:00:0b][ip:<nil>][labels:[100]]203.0.113.2 00:00:17 [ Origin: i LocalPref: 100 Extcomms: [VXLAN], [65000:268435556] ]
*> [type:macadv][rd:203.0.113.2:200][esi:single-homed][etag:0][mac:50:54:33:00:00:0a][ip:<nil>][labels:[200]]203.0.113.2 00:00:17 [ Origin: i LocalPref: 100 Extcomms: [VXLAN], [65000:268435656] ]
*> [type:multicast][rd:203.0.113.2:100][etag:0][ip:203.0.113.2]203.0.113.2 00:00:17 [ Origin: i LocalPref: 100 Extcomms: [VXLAN], [65000:268435556] ]
*> [type:multicast][rd:203.0.113.2:200][etag:0][ip:203.0.113.2]203.0.113.2 00:00:17 [ Origin: i LocalPref: 100 Extcomms: [VXLAN], [65000:268435656] ]
Received routes
Each VTEP should have received the type 2 and type 3 routes from its
fellow VTEPs, through the route reflectors. You can check with the
show bgp evpn route command of vtysh.
Does Quagga correctly understand the received routes? The type 3
routes are translated to an assocation between the remote VTEPs and
the VNIs:
# show evpn vni
Number of VNIs: 2
VNI VxLAN IF VTEP IP # MACs # ARPs Remote VTEPs
100 vxlan100 203.0.113.2 4 0 203.0.113.3
203.0.113.1
200 vxlan200 203.0.113.2 3 0 203.0.113.3
203.0.113.1
The type 2 routes are translated to an association between the remote
MACs and the remote VTEPs:
# show evpn mac vni 100
Number of MACs (local and remote) known for this VNI: 4
MAC Type Intf/Remote VTEP VLAN
50:54:33:00:00:09 remote 203.0.113.1
50:54:33:00:00:0a local eth1.100
50:54:33:00:00:0b local eth2.100
50:54:33:00:00:0c remote 203.0.113.3
FDB configuration
The last step is to ensure Quagga has correctly provided the
received information to the kernel. This can be checked with the
bridge command:
# bridge fdb show dev vxlan100 grep dst
00:00:00:00:00:00 dst 203.0.113.1 self permanent
00:00:00:00:00:00 dst 203.0.113.3 self permanent
50:54:33:00:00:0c dst 203.0.113.3 self
50:54:33:00:00:09 dst 203.0.113.1 self
All good! The two first lines are the translation of the type 3 routes
(any BUM frame will be sent to both 203.0.113.1 and 203.0.113.3)
and the two last ones are the translation of the type 2 routes.
Interoperability
One of the strength of BGP EVPN is the interoperability with other
network vendors. To demonstrate it works as expected, we will
configure a Juniper vMX to act as a VTEP.
First, we need to configure the physical
bridge9. This is similar to the use of ip link and
brctl with Linux. We only configure one physical interface with two
old-school VLANs paired with matching VNIs.
interfaces
ge-0/0/1
unit 0
family bridge
interface-mode trunk;
vlan-id-list [ 100 200 ];
routing-instances
switch
instance-type virtual-switch;
interface ge-0/0/1.0;
bridge-domains
vlan100
domain-type bridge;
vlan-id 100;
vxlan
vni 100;
ingress-node-replication;
vlan200
domain-type bridge;
vlan-id 200;
vxlan
vni 200;
ingress-node-replication;
Then, we configure BGP EVPN to advertise all known VNIs. The
configuration is quite similar to the one we did with Quagga:
protocols
bgp
group fabric
type internal;
multihop;
family evpn signaling;
local-address 203.0.113.3;
neighbor 203.0.113.253;
neighbor 203.0.113.254;
routing-instances
switch
vtep-source-interface lo0.0;
route-distinguisher 203.0.113.3:1; #
vrf-import EVPN-VRF-VXLAN;
vrf-target
target:65000:1;
auto;
protocols
evpn
encapsulation vxlan;
extended-vni-list all;
multicast-mode ingress-replication;
routing-options
router-id 203.0.113.3;
autonomous-system 65000;
policy-options
policy-statement EVPN-VRF-VXLAN
then accept;
We also need a small compatibility patch for Cumulus
Quagga10.
The routes sent by this configuration are very similar to the routes
sent by Quagga. The main differences are:
- on JunOS, the route distinguisher is configured statically (in ), and
- on JunOS, the VNI is also encoded as an Ethernet tag ID.
Here is a type 3 route, as sent by JunOS:
> show route table bgp.evpn.0 receive-protocol bgp 203.0.113.3 extensive
bgp.evpn.0: 13 destinations, 13 routes (13 active, 0 holddown, 0 hidden)
* 3:203.0.113.3:1::100::203.0.113.3/304 IM (1 entry, 1 announced)
Accepted
Route Distinguisher: 203.0.113.3:1
Nexthop: 203.0.113.3
Localpref: 100
AS path: I
Communities: target:65000:268435556 encapsulation:vxlan(0x8)
PMSI: Flags 0x0: Label 6: Type INGRESS-REPLICATION 203.0.113.3
[...]
Here is a type 2 route:
> show route table bgp.evpn.0 receive-protocol bgp 203.0.113.3 extensive
bgp.evpn.0: 13 destinations, 13 routes (13 active, 0 holddown, 0 hidden)
* 2:203.0.113.3:1::200::50:54:33:00:00:0f/304 MAC/IP (1 entry, 1 announced)
Accepted
Route Distinguisher: 203.0.113.3:1
Route Label: 200
ESI: 00:00:00:00:00:00:00:00:00:00
Nexthop: 203.0.113.3
Localpref: 100
AS path: I
Communities: target:65000:268435656 encapsulation:vxlan(0x8)
[...]
We can check that the vMX is able to make sense of the routes it
receives from its peers running Quagga:
> show evpn database l2-domain-id 100
Instance: switch
VLAN DomainId MAC address Active source Timestamp IP address
100 50:54:33:00:00:0c 203.0.113.1 Apr 30 12:46:20
100 50:54:33:00:00:0d 203.0.113.2 Apr 30 12:32:42
100 50:54:33:00:00:0e 203.0.113.2 Apr 30 12:46:20
100 50:54:33:00:00:0f ge-0/0/1.0 Apr 30 12:45:55
On the other end, if we look at one of the Quagga-based VTEP, we can
check the received routes are correctly understood:
# show evpn vni 100
VNI: 100
VxLAN interface: vxlan100 ifIndex: 9 VTEP IP: 203.0.113.1
Remote VTEPs for this VNI:
203.0.113.3
203.0.113.2
Number of MACs (local and remote) known for this VNI: 4
Number of ARPs (IPv4 and IPv6, local and remote) known for this VNI: 0
# show evpn mac vni 100
Number of MACs (local and remote) known for this VNI: 4
MAC Type Intf/Remote VTEP VLAN
50:54:33:00:00:0c local eth1.100
50:54:33:00:00:0d remote 203.0.113.2
50:54:33:00:00:0e remote 203.0.113.2
50:54:33:00:00:0f remote 203.0.113.3
Get in touch if you have some success with other vendors!
-
For example, they may use bridges to connect containers
together.
-
Such a feature can replace proprietary
implementations of MC-LAG allowing several VTEPs to act as a
endpoint for a single link aggregation group. This is not needed
on our scenario where hypervisors act as VTEPs.
-
The development of Quagga is slow and closed . New
features are often stalled. FRR is placed under the umbrella of
the Linux Foundation, has a GitHub-centered development model and
an election process. It already has several interesting
enhancements (notably, BGP add-path, BGP unnumbered, MPLS and
LDP).
-
I am unenthusiastic about projects whose the sole purpose is to
rewrite something in Go. However, while being quite young, GoBGP
is quite valuable on its own (good architecture, good
performance).
-
The 48-port version is around $10,000 with the BGP license.
-
An empty chassis with a dual routing engine (RE-S-1800X4-16G) is around $30,000.
-
I don t know how pricey the vRR is. For evaluation purposes,
it can be downloaded for free if you are a customer.
-
The value 100 used in the route distinguishier
(
203.0.113.2:100) is not the one used to encode the VNI. The VNI
is encoded in the route target (65000:268435556), in the 24
least signifiant bits (268435556 & 0xffffff equals 100). As
long as VNIs are unique, we don t have to understand those
details.
-
For some reason, the use of a virtual switch is
mandatory. This is specific to this platform: a QFX doesn t
require this.
-
The encoding of the VNI into the route target is being
standardized in draft-ietf-bess-evpn-overlay. Juniper already
implements this draft.
interfaces lo0 unit 0 family inet address 203.0.113.254/32; protocols bgp group fabric family evpn signaling /* Do not try to install EVPN routes */ no-install; type internal; cluster 203.0.113.254; local-address 203.0.113.254; allow 203.0.113.0/24; routing-options router-id 203.0.113.254; autonomous-system 65000;
VXLANs can be provisioned with the following script. Source-address
learning is disabled as we will rely solely on BGP EVPN to synchronize
FDBs between the hypervisors.
for vni in 100 200; do # Create VXLAN interface ip link add vxlan$ vni type vxlan id $ vni \ dstport 4789 \ local 203.0.113.2 \ nolearning # Create companion bridge brctl addbr br$ vni brctl addif br$ vni vxlan$ vni brctl stp br$ vni off ip link set up dev br$ vni ip link set up dev vxlan$ vni done # Attach each VM to the appropriate segment brctl addif br100 vnet10 brctl addif br100 vnet11 brctl addif br200 vnet12
advertise-all-vni directive to
publish all local VNIs.
router bgp 65000 bgp router-id 203.0.113.2 no bgp default ipv4-unicast neighbor fabric peer-group neighbor fabric remote-as 65000 neighbor fabric capability extended-nexthop neighbor fabric update-source dummy0 ! BGP sessions with route reflectors neighbor 203.0.113.253 peer-group fabric neighbor 203.0.113.254 peer-group fabric ! address-family evpn neighbor fabric activate advertise-all-vni exit-address-family ! exit !
ping command shows if everything is in order:
$ ping -c10 -w1 -t1 ff02::1%eth0 PING ff02::1%eth0(ff02::1%eth0) 56 data bytes 64 bytes from fe80::5254:33ff:fe00:8%eth0: icmp_seq=1 ttl=64 time=0.016 ms 64 bytes from fe80::5254:33ff:fe00:b%eth0: icmp_seq=1 ttl=64 time=4.98 ms (DUP!) 64 bytes from fe80::5254:33ff:fe00:9%eth0: icmp_seq=1 ttl=64 time=4.99 ms (DUP!) 64 bytes from fe80::5254:33ff:fe00:a%eth0: icmp_seq=1 ttl=64 time=4.99 ms (DUP!) --- ff02::1%eth0 ping statistics --- 1 packets transmitted, 1 received, +3 duplicates, 0% packet loss, time 0ms rtt min/avg/max/mdev = 0.016/3.745/4.991/2.152 ms
Verification
Step by step, let s check how everything comes together.
Getting VXLAN information from the kernel
On each VTEP, Quagga should be able to retrieve the information
about configured VXLANs. This can be checked with vtysh:
# show interface vxlan100
Interface vxlan100 is up, line protocol is up
Link ups: 1 last: 2017/04/29 20:01:33.43
Link downs: 0 last: (never)
PTM status: disabled
vrf: Default-IP-Routing-Table
index 11 metric 0 mtu 1500
flags: <UP,BROADCAST,RUNNING,MULTICAST>
Type: Ethernet
HWaddr: 62:42:7a:86:44:01
inet6 fe80::6042:7aff:fe86:4401/64
Interface Type Vxlan
VxLAN Id 100
Access VLAN Id 1
Master (bridge) ifindex 9 ifp 0x56536e3f3470
The important points are:
- the VNI is 100, and
- the bridge device was correctly detected.
Quagga should also be able to retrieve information about the local
MAC addresses :
# show evpn mac vni 100
Number of MACs (local and remote) known for this VNI: 2
MAC Type Intf/Remote VTEP VLAN
50:54:33:00:00:0a local eth1.100
50:54:33:00:00:0b local eth2.100
BGP sessions
Each VTEP has to establish a BGP session to the route reflectors. On
the VTEP, this can be checked by running vtysh:
# show bgp neighbors 203.0.113.254
BGP neighbor is 203.0.113.254, remote AS 65000, local AS 65000, internal link
Member of peer-group fabric for session parameters
BGP version 4, remote router ID 203.0.113.254
BGP state = Established, up for 00:00:45
Neighbor capabilities:
4 Byte AS: advertised and received
AddPath:
L2VPN EVPN: RX advertised L2VPN EVPN
Route refresh: advertised and received(new)
Address family L2VPN EVPN: advertised and received
Hostname Capability: advertised
Graceful Restart Capabilty: advertised
[...]
For address family: L2VPN EVPN
fabric peer-group member
Update group 1, subgroup 1
Packet Queue length 0
Community attribute sent to this neighbor(both)
8 accepted prefixes
Connections established 1; dropped 0
Last reset never
Local host: 203.0.113.2, Local port: 37603
Foreign host: 203.0.113.254, Foreign port: 179
The output includes the following information:
- the BGP state is
Established,
- the address family
L2VPN EVPN is correctly advertised, and
- 8 routes are received from this route reflector.
The state of the BGP sessions can also be checked from the route
reflectors. With GoBGP, use the following command:
# gobgp neighbor 203.0.113.2
BGP neighbor is 203.0.113.2, remote AS 65000, route-reflector-client
BGP version 4, remote router ID 203.0.113.2
BGP state = established, up for 00:04:30
BGP OutQ = 0, Flops = 0
Hold time is 9, keepalive interval is 3 seconds
Configured hold time is 90, keepalive interval is 30 seconds
Neighbor capabilities:
multiprotocol:
l2vpn-evpn: advertised and received
route-refresh: advertised and received
graceful-restart: received
4-octet-as: advertised and received
add-path: received
UnknownCapability(73): received
cisco-route-refresh: received
[...]
Route statistics:
Advertised: 8
Received: 5
Accepted: 5
With JunOS, use the below command:
> show bgp neighbor 203.0.113.2
Peer: 203.0.113.2+38089 AS 65000 Local: 203.0.113.254+179 AS 65000
Group: fabric Routing-Instance: master
Forwarding routing-instance: master
Type: Internal State: Established
Last State: OpenConfirm Last Event: RecvKeepAlive
Last Error: None
Options: <Preference LocalAddress Cluster AddressFamily Rib-group Refresh>
Address families configured: evpn
Local Address: 203.0.113.254 Holdtime: 90 Preference: 170
NLRI evpn: NoInstallForwarding
Number of flaps: 0
Peer ID: 203.0.113.2 Local ID: 203.0.113.254 Active Holdtime: 9
Keepalive Interval: 3 Group index: 0 Peer index: 2
I/O Session Thread: bgpio-0 State: Enabled
BFD: disabled, down
NLRI for restart configured on peer: evpn
NLRI advertised by peer: evpn
NLRI for this session: evpn
Peer supports Refresh capability (2)
Stale routes from peer are kept for: 300
Peer does not support Restarter functionality
NLRI that restart is negotiated for: evpn
NLRI of received end-of-rib markers: evpn
NLRI of all end-of-rib markers sent: evpn
Peer does not support LLGR Restarter or Receiver functionality
Peer supports 4 byte AS extension (peer-as 65000)
NLRI's for which peer can receive multiple paths: evpn
Table bgp.evpn.0 Bit: 20000
RIB State: BGP restart is complete
RIB State: VPN restart is complete
Send state: in sync
Active prefixes: 5
Received prefixes: 5
Accepted prefixes: 5
Suppressed due to damping: 0
Advertised prefixes: 8
Last traffic (seconds): Received 276 Sent 170 Checked 276
Input messages: Total 61 Updates 3 Refreshes 0 Octets 1470
Output messages: Total 62 Updates 4 Refreshes 0 Octets 1775
Output Queue[1]: 0 (bgp.evpn.0, evpn)
If a BGP session cannot be established, the logs of each BGP daemon
should mention the cause.
Sent routes
From each VTEP, Quagga needs to send:
- one type 3 route for each local VNI, and
- one type 2 route for each local MAC address.
The best place to check the received routes is on one of the route
reflectors. If you are using JunOS, the following command will display
the received routes from the provided VTEP:
> show route table bgp.evpn.0 receive-protocol bgp 203.0.113.2
bgp.evpn.0: 10 destinations, 10 routes (10 active, 0 holddown, 0 hidden)
Prefix Nexthop MED Lclpref AS path
2:203.0.113.2:100::0::50:54:33:00:00:0a/304 MAC/IP
* 203.0.113.2 100 I
2:203.0.113.2:100::0::50:54:33:00:00:0b/304 MAC/IP
* 203.0.113.2 100 I
3:203.0.113.2:100::0::203.0.113.2/304 IM
* 203.0.113.2 100 I
3:203.0.113.2:200::0::203.0.113.2/304 IM
* 203.0.113.2 100 I
There is one type 3 route for VNI 100 and another one for
VNI 200. There are also two type 2 routes for two MAC addresses on
VNI 100. To get more information, you can add the keyword
extensive. Here is a type 3 route advertising 203.0.113.2 as a
VTEP for VNI 1008:
> show route table bgp.evpn.0 receive-protocol bgp 203.0.113.2 extensive
bgp.evpn.0: 11 destinations, 11 routes (11 active, 0 holddown, 0 hidden)
* 3:203.0.113.2:100::0::203.0.113.2/304 IM (1 entry, 1 announced)
Accepted
Route Distinguisher: 203.0.113.2:100
Nexthop: 203.0.113.2
Localpref: 100
AS path: I
Communities: target:65000:268435556 encapsulation:vxlan(0x8)
[...]
Here is a type 2 route announcing the location of the
50:54:33:00:00:0a MAC address for VNI 100:
> show route table bgp.evpn.0 receive-protocol bgp 203.0.113.2 extensive
bgp.evpn.0: 11 destinations, 11 routes (11 active, 0 holddown, 0 hidden)
* 2:203.0.113.2:100::0::50:54:33:00:00:0a/304 MAC/IP (1 entry, 1 announced)
Accepted
Route Distinguisher: 203.0.113.2:100
Route Label: 100
ESI: 00:00:00:00:00:00:00:00:00:00
Nexthop: 203.0.113.2
Localpref: 100
AS path: I
Communities: target:65000:268435556 encapsulation:vxlan(0x8)
[...]
With Quagga, you can get a similar output with vtysh:
# show bgp evpn route
BGP table version is 0, local router ID is 203.0.113.1
Status codes: s suppressed, d damped, h history, * valid, > best, i - internal
Origin codes: i - IGP, e - EGP, ? - incomplete
EVPN type-2 prefix: [2]:[ESI]:[EthTag]:[MAClen]:[MAC]
EVPN type-3 prefix: [3]:[EthTag]:[IPlen]:[OrigIP]
Network Next Hop Metric LocPrf Weight Path
Route Distinguisher: 203.0.113.2:100
*>i[2]:[0]:[0]:[48]:[50:54:33:00:00:0a]
203.0.113.2 100 0 i
*>i[2]:[0]:[0]:[48]:[50:54:33:00:00:0b]
203.0.113.2 100 0 i
*>i[3]:[0]:[32]:[203.0.113.2]
203.0.113.2 100 0 i
Route Distinguisher: 203.0.113.2:200
*>i[3]:[0]:[32]:[203.0.113.2]
203.0.113.2 100 0 i
[...]
With GoBGP, use the following command:
# gobgp global rib -a evpn grep rd:203.0.113.2:200
Network Next Hop AS_PATH Age Attrs
*> [type:macadv][rd:203.0.113.2:100][esi:single-homed][etag:0][mac:50:54:33:00:00:0a][ip:<nil>][labels:[100]]203.0.113.2 00:00:17 [ Origin: i LocalPref: 100 Extcomms: [VXLAN], [65000:268435556] ]
*> [type:macadv][rd:203.0.113.2:100][esi:single-homed][etag:0][mac:50:54:33:00:00:0b][ip:<nil>][labels:[100]]203.0.113.2 00:00:17 [ Origin: i LocalPref: 100 Extcomms: [VXLAN], [65000:268435556] ]
*> [type:macadv][rd:203.0.113.2:200][esi:single-homed][etag:0][mac:50:54:33:00:00:0a][ip:<nil>][labels:[200]]203.0.113.2 00:00:17 [ Origin: i LocalPref: 100 Extcomms: [VXLAN], [65000:268435656] ]
*> [type:multicast][rd:203.0.113.2:100][etag:0][ip:203.0.113.2]203.0.113.2 00:00:17 [ Origin: i LocalPref: 100 Extcomms: [VXLAN], [65000:268435556] ]
*> [type:multicast][rd:203.0.113.2:200][etag:0][ip:203.0.113.2]203.0.113.2 00:00:17 [ Origin: i LocalPref: 100 Extcomms: [VXLAN], [65000:268435656] ]
Received routes
Each VTEP should have received the type 2 and type 3 routes from its
fellow VTEPs, through the route reflectors. You can check with the
show bgp evpn route command of vtysh.
Does Quagga correctly understand the received routes? The type 3
routes are translated to an assocation between the remote VTEPs and
the VNIs:
# show evpn vni
Number of VNIs: 2
VNI VxLAN IF VTEP IP # MACs # ARPs Remote VTEPs
100 vxlan100 203.0.113.2 4 0 203.0.113.3
203.0.113.1
200 vxlan200 203.0.113.2 3 0 203.0.113.3
203.0.113.1
The type 2 routes are translated to an association between the remote
MACs and the remote VTEPs:
# show evpn mac vni 100
Number of MACs (local and remote) known for this VNI: 4
MAC Type Intf/Remote VTEP VLAN
50:54:33:00:00:09 remote 203.0.113.1
50:54:33:00:00:0a local eth1.100
50:54:33:00:00:0b local eth2.100
50:54:33:00:00:0c remote 203.0.113.3
FDB configuration
The last step is to ensure Quagga has correctly provided the
received information to the kernel. This can be checked with the
bridge command:
# bridge fdb show dev vxlan100 grep dst
00:00:00:00:00:00 dst 203.0.113.1 self permanent
00:00:00:00:00:00 dst 203.0.113.3 self permanent
50:54:33:00:00:0c dst 203.0.113.3 self
50:54:33:00:00:09 dst 203.0.113.1 self
All good! The two first lines are the translation of the type 3 routes
(any BUM frame will be sent to both 203.0.113.1 and 203.0.113.3)
and the two last ones are the translation of the type 2 routes.
Interoperability
One of the strength of BGP EVPN is the interoperability with other
network vendors. To demonstrate it works as expected, we will
configure a Juniper vMX to act as a VTEP.
First, we need to configure the physical
bridge9. This is similar to the use of ip link and
brctl with Linux. We only configure one physical interface with two
old-school VLANs paired with matching VNIs.
interfaces
ge-0/0/1
unit 0
family bridge
interface-mode trunk;
vlan-id-list [ 100 200 ];
routing-instances
switch
instance-type virtual-switch;
interface ge-0/0/1.0;
bridge-domains
vlan100
domain-type bridge;
vlan-id 100;
vxlan
vni 100;
ingress-node-replication;
vlan200
domain-type bridge;
vlan-id 200;
vxlan
vni 200;
ingress-node-replication;
Then, we configure BGP EVPN to advertise all known VNIs. The
configuration is quite similar to the one we did with Quagga:
protocols
bgp
group fabric
type internal;
multihop;
family evpn signaling;
local-address 203.0.113.3;
neighbor 203.0.113.253;
neighbor 203.0.113.254;
routing-instances
switch
vtep-source-interface lo0.0;
route-distinguisher 203.0.113.3:1; #
vrf-import EVPN-VRF-VXLAN;
vrf-target
target:65000:1;
auto;
protocols
evpn
encapsulation vxlan;
extended-vni-list all;
multicast-mode ingress-replication;
routing-options
router-id 203.0.113.3;
autonomous-system 65000;
policy-options
policy-statement EVPN-VRF-VXLAN
then accept;
We also need a small compatibility patch for Cumulus
Quagga10.
The routes sent by this configuration are very similar to the routes
sent by Quagga. The main differences are:
- on JunOS, the route distinguisher is configured statically (in ), and
- on JunOS, the VNI is also encoded as an Ethernet tag ID.
Here is a type 3 route, as sent by JunOS:
> show route table bgp.evpn.0 receive-protocol bgp 203.0.113.3 extensive
bgp.evpn.0: 13 destinations, 13 routes (13 active, 0 holddown, 0 hidden)
* 3:203.0.113.3:1::100::203.0.113.3/304 IM (1 entry, 1 announced)
Accepted
Route Distinguisher: 203.0.113.3:1
Nexthop: 203.0.113.3
Localpref: 100
AS path: I
Communities: target:65000:268435556 encapsulation:vxlan(0x8)
PMSI: Flags 0x0: Label 6: Type INGRESS-REPLICATION 203.0.113.3
[...]
Here is a type 2 route:
> show route table bgp.evpn.0 receive-protocol bgp 203.0.113.3 extensive
bgp.evpn.0: 13 destinations, 13 routes (13 active, 0 holddown, 0 hidden)
* 2:203.0.113.3:1::200::50:54:33:00:00:0f/304 MAC/IP (1 entry, 1 announced)
Accepted
Route Distinguisher: 203.0.113.3:1
Route Label: 200
ESI: 00:00:00:00:00:00:00:00:00:00
Nexthop: 203.0.113.3
Localpref: 100
AS path: I
Communities: target:65000:268435656 encapsulation:vxlan(0x8)
[...]
We can check that the vMX is able to make sense of the routes it
receives from its peers running Quagga:
> show evpn database l2-domain-id 100
Instance: switch
VLAN DomainId MAC address Active source Timestamp IP address
100 50:54:33:00:00:0c 203.0.113.1 Apr 30 12:46:20
100 50:54:33:00:00:0d 203.0.113.2 Apr 30 12:32:42
100 50:54:33:00:00:0e 203.0.113.2 Apr 30 12:46:20
100 50:54:33:00:00:0f ge-0/0/1.0 Apr 30 12:45:55
On the other end, if we look at one of the Quagga-based VTEP, we can
check the received routes are correctly understood:
# show evpn vni 100
VNI: 100
VxLAN interface: vxlan100 ifIndex: 9 VTEP IP: 203.0.113.1
Remote VTEPs for this VNI:
203.0.113.3
203.0.113.2
Number of MACs (local and remote) known for this VNI: 4
Number of ARPs (IPv4 and IPv6, local and remote) known for this VNI: 0
# show evpn mac vni 100
Number of MACs (local and remote) known for this VNI: 4
MAC Type Intf/Remote VTEP VLAN
50:54:33:00:00:0c local eth1.100
50:54:33:00:00:0d remote 203.0.113.2
50:54:33:00:00:0e remote 203.0.113.2
50:54:33:00:00:0f remote 203.0.113.3
Get in touch if you have some success with other vendors!
-
For example, they may use bridges to connect containers
together.
-
Such a feature can replace proprietary
implementations of MC-LAG allowing several VTEPs to act as a
endpoint for a single link aggregation group. This is not needed
on our scenario where hypervisors act as VTEPs.
-
The development of Quagga is slow and closed . New
features are often stalled. FRR is placed under the umbrella of
the Linux Foundation, has a GitHub-centered development model and
an election process. It already has several interesting
enhancements (notably, BGP add-path, BGP unnumbered, MPLS and
LDP).
-
I am unenthusiastic about projects whose the sole purpose is to
rewrite something in Go. However, while being quite young, GoBGP
is quite valuable on its own (good architecture, good
performance).
-
The 48-port version is around $10,000 with the BGP license.
-
An empty chassis with a dual routing engine (RE-S-1800X4-16G) is around $30,000.
-
I don t know how pricey the vRR is. For evaluation purposes,
it can be downloaded for free if you are a customer.
-
The value 100 used in the route distinguishier
(
203.0.113.2:100) is not the one used to encode the VNI. The VNI
is encoded in the route target (65000:268435556), in the 24
least signifiant bits (268435556 & 0xffffff equals 100). As
long as VNIs are unique, we don t have to understand those
details.
-
For some reason, the use of a virtual switch is
mandatory. This is specific to this platform: a QFX doesn t
require this.
-
The encoding of the VNI into the route target is being
standardized in draft-ietf-bess-evpn-overlay. Juniper already
implements this draft.
vtysh:
# show interface vxlan100 Interface vxlan100 is up, line protocol is up Link ups: 1 last: 2017/04/29 20:01:33.43 Link downs: 0 last: (never) PTM status: disabled vrf: Default-IP-Routing-Table index 11 metric 0 mtu 1500 flags: <UP,BROADCAST,RUNNING,MULTICAST> Type: Ethernet HWaddr: 62:42:7a:86:44:01 inet6 fe80::6042:7aff:fe86:4401/64 Interface Type Vxlan VxLAN Id 100 Access VLAN Id 1 Master (bridge) ifindex 9 ifp 0x56536e3f3470
- the VNI is 100, and
- the bridge device was correctly detected.
# show evpn mac vni 100 Number of MACs (local and remote) known for this VNI: 2 MAC Type Intf/Remote VTEP VLAN 50:54:33:00:00:0a local eth1.100 50:54:33:00:00:0b local eth2.100
BGP sessions
Each VTEP has to establish a BGP session to the route reflectors. On
the VTEP, this can be checked by running vtysh:
# show bgp neighbors 203.0.113.254
BGP neighbor is 203.0.113.254, remote AS 65000, local AS 65000, internal link
Member of peer-group fabric for session parameters
BGP version 4, remote router ID 203.0.113.254
BGP state = Established, up for 00:00:45
Neighbor capabilities:
4 Byte AS: advertised and received
AddPath:
L2VPN EVPN: RX advertised L2VPN EVPN
Route refresh: advertised and received(new)
Address family L2VPN EVPN: advertised and received
Hostname Capability: advertised
Graceful Restart Capabilty: advertised
[...]
For address family: L2VPN EVPN
fabric peer-group member
Update group 1, subgroup 1
Packet Queue length 0
Community attribute sent to this neighbor(both)
8 accepted prefixes
Connections established 1; dropped 0
Last reset never
Local host: 203.0.113.2, Local port: 37603
Foreign host: 203.0.113.254, Foreign port: 179
The output includes the following information:
- the BGP state is
Established,
- the address family
L2VPN EVPN is correctly advertised, and
- 8 routes are received from this route reflector.
The state of the BGP sessions can also be checked from the route
reflectors. With GoBGP, use the following command:
# gobgp neighbor 203.0.113.2
BGP neighbor is 203.0.113.2, remote AS 65000, route-reflector-client
BGP version 4, remote router ID 203.0.113.2
BGP state = established, up for 00:04:30
BGP OutQ = 0, Flops = 0
Hold time is 9, keepalive interval is 3 seconds
Configured hold time is 90, keepalive interval is 30 seconds
Neighbor capabilities:
multiprotocol:
l2vpn-evpn: advertised and received
route-refresh: advertised and received
graceful-restart: received
4-octet-as: advertised and received
add-path: received
UnknownCapability(73): received
cisco-route-refresh: received
[...]
Route statistics:
Advertised: 8
Received: 5
Accepted: 5
With JunOS, use the below command:
> show bgp neighbor 203.0.113.2
Peer: 203.0.113.2+38089 AS 65000 Local: 203.0.113.254+179 AS 65000
Group: fabric Routing-Instance: master
Forwarding routing-instance: master
Type: Internal State: Established
Last State: OpenConfirm Last Event: RecvKeepAlive
Last Error: None
Options: <Preference LocalAddress Cluster AddressFamily Rib-group Refresh>
Address families configured: evpn
Local Address: 203.0.113.254 Holdtime: 90 Preference: 170
NLRI evpn: NoInstallForwarding
Number of flaps: 0
Peer ID: 203.0.113.2 Local ID: 203.0.113.254 Active Holdtime: 9
Keepalive Interval: 3 Group index: 0 Peer index: 2
I/O Session Thread: bgpio-0 State: Enabled
BFD: disabled, down
NLRI for restart configured on peer: evpn
NLRI advertised by peer: evpn
NLRI for this session: evpn
Peer supports Refresh capability (2)
Stale routes from peer are kept for: 300
Peer does not support Restarter functionality
NLRI that restart is negotiated for: evpn
NLRI of received end-of-rib markers: evpn
NLRI of all end-of-rib markers sent: evpn
Peer does not support LLGR Restarter or Receiver functionality
Peer supports 4 byte AS extension (peer-as 65000)
NLRI's for which peer can receive multiple paths: evpn
Table bgp.evpn.0 Bit: 20000
RIB State: BGP restart is complete
RIB State: VPN restart is complete
Send state: in sync
Active prefixes: 5
Received prefixes: 5
Accepted prefixes: 5
Suppressed due to damping: 0
Advertised prefixes: 8
Last traffic (seconds): Received 276 Sent 170 Checked 276
Input messages: Total 61 Updates 3 Refreshes 0 Octets 1470
Output messages: Total 62 Updates 4 Refreshes 0 Octets 1775
Output Queue[1]: 0 (bgp.evpn.0, evpn)
If a BGP session cannot be established, the logs of each BGP daemon
should mention the cause.
Sent routes
From each VTEP, Quagga needs to send:
- one type 3 route for each local VNI, and
- one type 2 route for each local MAC address.
The best place to check the received routes is on one of the route
reflectors. If you are using JunOS, the following command will display
the received routes from the provided VTEP:
> show route table bgp.evpn.0 receive-protocol bgp 203.0.113.2
bgp.evpn.0: 10 destinations, 10 routes (10 active, 0 holddown, 0 hidden)
Prefix Nexthop MED Lclpref AS path
2:203.0.113.2:100::0::50:54:33:00:00:0a/304 MAC/IP
* 203.0.113.2 100 I
2:203.0.113.2:100::0::50:54:33:00:00:0b/304 MAC/IP
* 203.0.113.2 100 I
3:203.0.113.2:100::0::203.0.113.2/304 IM
* 203.0.113.2 100 I
3:203.0.113.2:200::0::203.0.113.2/304 IM
* 203.0.113.2 100 I
There is one type 3 route for VNI 100 and another one for
VNI 200. There are also two type 2 routes for two MAC addresses on
VNI 100. To get more information, you can add the keyword
extensive. Here is a type 3 route advertising 203.0.113.2 as a
VTEP for VNI 1008:
> show route table bgp.evpn.0 receive-protocol bgp 203.0.113.2 extensive
bgp.evpn.0: 11 destinations, 11 routes (11 active, 0 holddown, 0 hidden)
* 3:203.0.113.2:100::0::203.0.113.2/304 IM (1 entry, 1 announced)
Accepted
Route Distinguisher: 203.0.113.2:100
Nexthop: 203.0.113.2
Localpref: 100
AS path: I
Communities: target:65000:268435556 encapsulation:vxlan(0x8)
[...]
Here is a type 2 route announcing the location of the
50:54:33:00:00:0a MAC address for VNI 100:
> show route table bgp.evpn.0 receive-protocol bgp 203.0.113.2 extensive
bgp.evpn.0: 11 destinations, 11 routes (11 active, 0 holddown, 0 hidden)
* 2:203.0.113.2:100::0::50:54:33:00:00:0a/304 MAC/IP (1 entry, 1 announced)
Accepted
Route Distinguisher: 203.0.113.2:100
Route Label: 100
ESI: 00:00:00:00:00:00:00:00:00:00
Nexthop: 203.0.113.2
Localpref: 100
AS path: I
Communities: target:65000:268435556 encapsulation:vxlan(0x8)
[...]
With Quagga, you can get a similar output with vtysh:
# show bgp evpn route
BGP table version is 0, local router ID is 203.0.113.1
Status codes: s suppressed, d damped, h history, * valid, > best, i - internal
Origin codes: i - IGP, e - EGP, ? - incomplete
EVPN type-2 prefix: [2]:[ESI]:[EthTag]:[MAClen]:[MAC]
EVPN type-3 prefix: [3]:[EthTag]:[IPlen]:[OrigIP]
Network Next Hop Metric LocPrf Weight Path
Route Distinguisher: 203.0.113.2:100
*>i[2]:[0]:[0]:[48]:[50:54:33:00:00:0a]
203.0.113.2 100 0 i
*>i[2]:[0]:[0]:[48]:[50:54:33:00:00:0b]
203.0.113.2 100 0 i
*>i[3]:[0]:[32]:[203.0.113.2]
203.0.113.2 100 0 i
Route Distinguisher: 203.0.113.2:200
*>i[3]:[0]:[32]:[203.0.113.2]
203.0.113.2 100 0 i
[...]
With GoBGP, use the following command:
# gobgp global rib -a evpn grep rd:203.0.113.2:200
Network Next Hop AS_PATH Age Attrs
*> [type:macadv][rd:203.0.113.2:100][esi:single-homed][etag:0][mac:50:54:33:00:00:0a][ip:<nil>][labels:[100]]203.0.113.2 00:00:17 [ Origin: i LocalPref: 100 Extcomms: [VXLAN], [65000:268435556] ]
*> [type:macadv][rd:203.0.113.2:100][esi:single-homed][etag:0][mac:50:54:33:00:00:0b][ip:<nil>][labels:[100]]203.0.113.2 00:00:17 [ Origin: i LocalPref: 100 Extcomms: [VXLAN], [65000:268435556] ]
*> [type:macadv][rd:203.0.113.2:200][esi:single-homed][etag:0][mac:50:54:33:00:00:0a][ip:<nil>][labels:[200]]203.0.113.2 00:00:17 [ Origin: i LocalPref: 100 Extcomms: [VXLAN], [65000:268435656] ]
*> [type:multicast][rd:203.0.113.2:100][etag:0][ip:203.0.113.2]203.0.113.2 00:00:17 [ Origin: i LocalPref: 100 Extcomms: [VXLAN], [65000:268435556] ]
*> [type:multicast][rd:203.0.113.2:200][etag:0][ip:203.0.113.2]203.0.113.2 00:00:17 [ Origin: i LocalPref: 100 Extcomms: [VXLAN], [65000:268435656] ]
Received routes
Each VTEP should have received the type 2 and type 3 routes from its
fellow VTEPs, through the route reflectors. You can check with the
show bgp evpn route command of vtysh.
Does Quagga correctly understand the received routes? The type 3
routes are translated to an assocation between the remote VTEPs and
the VNIs:
# show evpn vni
Number of VNIs: 2
VNI VxLAN IF VTEP IP # MACs # ARPs Remote VTEPs
100 vxlan100 203.0.113.2 4 0 203.0.113.3
203.0.113.1
200 vxlan200 203.0.113.2 3 0 203.0.113.3
203.0.113.1
The type 2 routes are translated to an association between the remote
MACs and the remote VTEPs:
# show evpn mac vni 100
Number of MACs (local and remote) known for this VNI: 4
MAC Type Intf/Remote VTEP VLAN
50:54:33:00:00:09 remote 203.0.113.1
50:54:33:00:00:0a local eth1.100
50:54:33:00:00:0b local eth2.100
50:54:33:00:00:0c remote 203.0.113.3
FDB configuration
The last step is to ensure Quagga has correctly provided the
received information to the kernel. This can be checked with the
bridge command:
# bridge fdb show dev vxlan100 grep dst
00:00:00:00:00:00 dst 203.0.113.1 self permanent
00:00:00:00:00:00 dst 203.0.113.3 self permanent
50:54:33:00:00:0c dst 203.0.113.3 self
50:54:33:00:00:09 dst 203.0.113.1 self
All good! The two first lines are the translation of the type 3 routes
(any BUM frame will be sent to both 203.0.113.1 and 203.0.113.3)
and the two last ones are the translation of the type 2 routes.
Interoperability
One of the strength of BGP EVPN is the interoperability with other
network vendors. To demonstrate it works as expected, we will
configure a Juniper vMX to act as a VTEP.
First, we need to configure the physical
bridge9. This is similar to the use of ip link and
brctl with Linux. We only configure one physical interface with two
old-school VLANs paired with matching VNIs.
interfaces
ge-0/0/1
unit 0
family bridge
interface-mode trunk;
vlan-id-list [ 100 200 ];
routing-instances
switch
instance-type virtual-switch;
interface ge-0/0/1.0;
bridge-domains
vlan100
domain-type bridge;
vlan-id 100;
vxlan
vni 100;
ingress-node-replication;
vlan200
domain-type bridge;
vlan-id 200;
vxlan
vni 200;
ingress-node-replication;
Then, we configure BGP EVPN to advertise all known VNIs. The
configuration is quite similar to the one we did with Quagga:
protocols
bgp
group fabric
type internal;
multihop;
family evpn signaling;
local-address 203.0.113.3;
neighbor 203.0.113.253;
neighbor 203.0.113.254;
routing-instances
switch
vtep-source-interface lo0.0;
route-distinguisher 203.0.113.3:1; #
vrf-import EVPN-VRF-VXLAN;
vrf-target
target:65000:1;
auto;
protocols
evpn
encapsulation vxlan;
extended-vni-list all;
multicast-mode ingress-replication;
routing-options
router-id 203.0.113.3;
autonomous-system 65000;
policy-options
policy-statement EVPN-VRF-VXLAN
then accept;
We also need a small compatibility patch for Cumulus
Quagga10.
The routes sent by this configuration are very similar to the routes
sent by Quagga. The main differences are:
- on JunOS, the route distinguisher is configured statically (in ), and
- on JunOS, the VNI is also encoded as an Ethernet tag ID.
Here is a type 3 route, as sent by JunOS:
> show route table bgp.evpn.0 receive-protocol bgp 203.0.113.3 extensive
bgp.evpn.0: 13 destinations, 13 routes (13 active, 0 holddown, 0 hidden)
* 3:203.0.113.3:1::100::203.0.113.3/304 IM (1 entry, 1 announced)
Accepted
Route Distinguisher: 203.0.113.3:1
Nexthop: 203.0.113.3
Localpref: 100
AS path: I
Communities: target:65000:268435556 encapsulation:vxlan(0x8)
PMSI: Flags 0x0: Label 6: Type INGRESS-REPLICATION 203.0.113.3
[...]
Here is a type 2 route:
> show route table bgp.evpn.0 receive-protocol bgp 203.0.113.3 extensive
bgp.evpn.0: 13 destinations, 13 routes (13 active, 0 holddown, 0 hidden)
* 2:203.0.113.3:1::200::50:54:33:00:00:0f/304 MAC/IP (1 entry, 1 announced)
Accepted
Route Distinguisher: 203.0.113.3:1
Route Label: 200
ESI: 00:00:00:00:00:00:00:00:00:00
Nexthop: 203.0.113.3
Localpref: 100
AS path: I
Communities: target:65000:268435656 encapsulation:vxlan(0x8)
[...]
We can check that the vMX is able to make sense of the routes it
receives from its peers running Quagga:
> show evpn database l2-domain-id 100
Instance: switch
VLAN DomainId MAC address Active source Timestamp IP address
100 50:54:33:00:00:0c 203.0.113.1 Apr 30 12:46:20
100 50:54:33:00:00:0d 203.0.113.2 Apr 30 12:32:42
100 50:54:33:00:00:0e 203.0.113.2 Apr 30 12:46:20
100 50:54:33:00:00:0f ge-0/0/1.0 Apr 30 12:45:55
On the other end, if we look at one of the Quagga-based VTEP, we can
check the received routes are correctly understood:
# show evpn vni 100
VNI: 100
VxLAN interface: vxlan100 ifIndex: 9 VTEP IP: 203.0.113.1
Remote VTEPs for this VNI:
203.0.113.3
203.0.113.2
Number of MACs (local and remote) known for this VNI: 4
Number of ARPs (IPv4 and IPv6, local and remote) known for this VNI: 0
# show evpn mac vni 100
Number of MACs (local and remote) known for this VNI: 4
MAC Type Intf/Remote VTEP VLAN
50:54:33:00:00:0c local eth1.100
50:54:33:00:00:0d remote 203.0.113.2
50:54:33:00:00:0e remote 203.0.113.2
50:54:33:00:00:0f remote 203.0.113.3
Get in touch if you have some success with other vendors!
-
For example, they may use bridges to connect containers
together.
-
Such a feature can replace proprietary
implementations of MC-LAG allowing several VTEPs to act as a
endpoint for a single link aggregation group. This is not needed
on our scenario where hypervisors act as VTEPs.
-
The development of Quagga is slow and closed . New
features are often stalled. FRR is placed under the umbrella of
the Linux Foundation, has a GitHub-centered development model and
an election process. It already has several interesting
enhancements (notably, BGP add-path, BGP unnumbered, MPLS and
LDP).
-
I am unenthusiastic about projects whose the sole purpose is to
rewrite something in Go. However, while being quite young, GoBGP
is quite valuable on its own (good architecture, good
performance).
-
The 48-port version is around $10,000 with the BGP license.
-
An empty chassis with a dual routing engine (RE-S-1800X4-16G) is around $30,000.
-
I don t know how pricey the vRR is. For evaluation purposes,
it can be downloaded for free if you are a customer.
-
The value 100 used in the route distinguishier
(
203.0.113.2:100) is not the one used to encode the VNI. The VNI
is encoded in the route target (65000:268435556), in the 24
least signifiant bits (268435556 & 0xffffff equals 100). As
long as VNIs are unique, we don t have to understand those
details.
-
For some reason, the use of a virtual switch is
mandatory. This is specific to this platform: a QFX doesn t
require this.
-
The encoding of the VNI into the route target is being
standardized in draft-ietf-bess-evpn-overlay. Juniper already
implements this draft.
# show bgp neighbors 203.0.113.254 BGP neighbor is 203.0.113.254, remote AS 65000, local AS 65000, internal link Member of peer-group fabric for session parameters BGP version 4, remote router ID 203.0.113.254 BGP state = Established, up for 00:00:45 Neighbor capabilities: 4 Byte AS: advertised and received AddPath: L2VPN EVPN: RX advertised L2VPN EVPN Route refresh: advertised and received(new) Address family L2VPN EVPN: advertised and received Hostname Capability: advertised Graceful Restart Capabilty: advertised [...] For address family: L2VPN EVPN fabric peer-group member Update group 1, subgroup 1 Packet Queue length 0 Community attribute sent to this neighbor(both) 8 accepted prefixes Connections established 1; dropped 0 Last reset never Local host: 203.0.113.2, Local port: 37603 Foreign host: 203.0.113.254, Foreign port: 179
Established,L2VPN EVPN is correctly advertised, and# gobgp neighbor 203.0.113.2 BGP neighbor is 203.0.113.2, remote AS 65000, route-reflector-client BGP version 4, remote router ID 203.0.113.2 BGP state = established, up for 00:04:30 BGP OutQ = 0, Flops = 0 Hold time is 9, keepalive interval is 3 seconds Configured hold time is 90, keepalive interval is 30 seconds Neighbor capabilities: multiprotocol: l2vpn-evpn: advertised and received route-refresh: advertised and received graceful-restart: received 4-octet-as: advertised and received add-path: received UnknownCapability(73): received cisco-route-refresh: received [...] Route statistics: Advertised: 8 Received: 5 Accepted: 5
> show bgp neighbor 203.0.113.2 Peer: 203.0.113.2+38089 AS 65000 Local: 203.0.113.254+179 AS 65000 Group: fabric Routing-Instance: master Forwarding routing-instance: master Type: Internal State: Established Last State: OpenConfirm Last Event: RecvKeepAlive Last Error: None Options: <Preference LocalAddress Cluster AddressFamily Rib-group Refresh> Address families configured: evpn Local Address: 203.0.113.254 Holdtime: 90 Preference: 170 NLRI evpn: NoInstallForwarding Number of flaps: 0 Peer ID: 203.0.113.2 Local ID: 203.0.113.254 Active Holdtime: 9 Keepalive Interval: 3 Group index: 0 Peer index: 2 I/O Session Thread: bgpio-0 State: Enabled BFD: disabled, down NLRI for restart configured on peer: evpn NLRI advertised by peer: evpn NLRI for this session: evpn Peer supports Refresh capability (2) Stale routes from peer are kept for: 300 Peer does not support Restarter functionality NLRI that restart is negotiated for: evpn NLRI of received end-of-rib markers: evpn NLRI of all end-of-rib markers sent: evpn Peer does not support LLGR Restarter or Receiver functionality Peer supports 4 byte AS extension (peer-as 65000) NLRI's for which peer can receive multiple paths: evpn Table bgp.evpn.0 Bit: 20000 RIB State: BGP restart is complete RIB State: VPN restart is complete Send state: in sync Active prefixes: 5 Received prefixes: 5 Accepted prefixes: 5 Suppressed due to damping: 0 Advertised prefixes: 8 Last traffic (seconds): Received 276 Sent 170 Checked 276 Input messages: Total 61 Updates 3 Refreshes 0 Octets 1470 Output messages: Total 62 Updates 4 Refreshes 0 Octets 1775 Output Queue[1]: 0 (bgp.evpn.0, evpn)
- one type 3 route for each local VNI, and
- one type 2 route for each local MAC address.
> show route table bgp.evpn.0 receive-protocol bgp 203.0.113.2 bgp.evpn.0: 10 destinations, 10 routes (10 active, 0 holddown, 0 hidden) Prefix Nexthop MED Lclpref AS path 2:203.0.113.2:100::0::50:54:33:00:00:0a/304 MAC/IP * 203.0.113.2 100 I 2:203.0.113.2:100::0::50:54:33:00:00:0b/304 MAC/IP * 203.0.113.2 100 I 3:203.0.113.2:100::0::203.0.113.2/304 IM * 203.0.113.2 100 I 3:203.0.113.2:200::0::203.0.113.2/304 IM * 203.0.113.2 100 I
extensive. Here is a type 3 route advertising 203.0.113.2 as a
VTEP for VNI 1008:
> show route table bgp.evpn.0 receive-protocol bgp 203.0.113.2 extensive bgp.evpn.0: 11 destinations, 11 routes (11 active, 0 holddown, 0 hidden) * 3:203.0.113.2:100::0::203.0.113.2/304 IM (1 entry, 1 announced) Accepted Route Distinguisher: 203.0.113.2:100 Nexthop: 203.0.113.2 Localpref: 100 AS path: I Communities: target:65000:268435556 encapsulation:vxlan(0x8) [...]
50:54:33:00:00:0a MAC address for VNI 100:
> show route table bgp.evpn.0 receive-protocol bgp 203.0.113.2 extensive bgp.evpn.0: 11 destinations, 11 routes (11 active, 0 holddown, 0 hidden) * 2:203.0.113.2:100::0::50:54:33:00:00:0a/304 MAC/IP (1 entry, 1 announced) Accepted Route Distinguisher: 203.0.113.2:100 Route Label: 100 ESI: 00:00:00:00:00:00:00:00:00:00 Nexthop: 203.0.113.2 Localpref: 100 AS path: I Communities: target:65000:268435556 encapsulation:vxlan(0x8) [...]
vtysh:
# show bgp evpn route BGP table version is 0, local router ID is 203.0.113.1 Status codes: s suppressed, d damped, h history, * valid, > best, i - internal Origin codes: i - IGP, e - EGP, ? - incomplete EVPN type-2 prefix: [2]:[ESI]:[EthTag]:[MAClen]:[MAC] EVPN type-3 prefix: [3]:[EthTag]:[IPlen]:[OrigIP] Network Next Hop Metric LocPrf Weight Path Route Distinguisher: 203.0.113.2:100 *>i[2]:[0]:[0]:[48]:[50:54:33:00:00:0a] 203.0.113.2 100 0 i *>i[2]:[0]:[0]:[48]:[50:54:33:00:00:0b] 203.0.113.2 100 0 i *>i[3]:[0]:[32]:[203.0.113.2] 203.0.113.2 100 0 i Route Distinguisher: 203.0.113.2:200 *>i[3]:[0]:[32]:[203.0.113.2] 203.0.113.2 100 0 i [...]
# gobgp global rib -a evpn grep rd:203.0.113.2:200 Network Next Hop AS_PATH Age Attrs *> [type:macadv][rd:203.0.113.2:100][esi:single-homed][etag:0][mac:50:54:33:00:00:0a][ip:<nil>][labels:[100]]203.0.113.2 00:00:17 [ Origin: i LocalPref: 100 Extcomms: [VXLAN], [65000:268435556] ] *> [type:macadv][rd:203.0.113.2:100][esi:single-homed][etag:0][mac:50:54:33:00:00:0b][ip:<nil>][labels:[100]]203.0.113.2 00:00:17 [ Origin: i LocalPref: 100 Extcomms: [VXLAN], [65000:268435556] ] *> [type:macadv][rd:203.0.113.2:200][esi:single-homed][etag:0][mac:50:54:33:00:00:0a][ip:<nil>][labels:[200]]203.0.113.2 00:00:17 [ Origin: i LocalPref: 100 Extcomms: [VXLAN], [65000:268435656] ] *> [type:multicast][rd:203.0.113.2:100][etag:0][ip:203.0.113.2]203.0.113.2 00:00:17 [ Origin: i LocalPref: 100 Extcomms: [VXLAN], [65000:268435556] ] *> [type:multicast][rd:203.0.113.2:200][etag:0][ip:203.0.113.2]203.0.113.2 00:00:17 [ Origin: i LocalPref: 100 Extcomms: [VXLAN], [65000:268435656] ]
Received routes
Each VTEP should have received the type 2 and type 3 routes from its
fellow VTEPs, through the route reflectors. You can check with the
show bgp evpn route command of vtysh.
Does Quagga correctly understand the received routes? The type 3
routes are translated to an assocation between the remote VTEPs and
the VNIs:
# show evpn vni
Number of VNIs: 2
VNI VxLAN IF VTEP IP # MACs # ARPs Remote VTEPs
100 vxlan100 203.0.113.2 4 0 203.0.113.3
203.0.113.1
200 vxlan200 203.0.113.2 3 0 203.0.113.3
203.0.113.1
The type 2 routes are translated to an association between the remote
MACs and the remote VTEPs:
# show evpn mac vni 100
Number of MACs (local and remote) known for this VNI: 4
MAC Type Intf/Remote VTEP VLAN
50:54:33:00:00:09 remote 203.0.113.1
50:54:33:00:00:0a local eth1.100
50:54:33:00:00:0b local eth2.100
50:54:33:00:00:0c remote 203.0.113.3
FDB configuration
The last step is to ensure Quagga has correctly provided the
received information to the kernel. This can be checked with the
bridge command:
# bridge fdb show dev vxlan100 grep dst
00:00:00:00:00:00 dst 203.0.113.1 self permanent
00:00:00:00:00:00 dst 203.0.113.3 self permanent
50:54:33:00:00:0c dst 203.0.113.3 self
50:54:33:00:00:09 dst 203.0.113.1 self
All good! The two first lines are the translation of the type 3 routes
(any BUM frame will be sent to both 203.0.113.1 and 203.0.113.3)
and the two last ones are the translation of the type 2 routes.
Interoperability
One of the strength of BGP EVPN is the interoperability with other
network vendors. To demonstrate it works as expected, we will
configure a Juniper vMX to act as a VTEP.
First, we need to configure the physical
bridge9. This is similar to the use of ip link and
brctl with Linux. We only configure one physical interface with two
old-school VLANs paired with matching VNIs.
interfaces
ge-0/0/1
unit 0
family bridge
interface-mode trunk;
vlan-id-list [ 100 200 ];
routing-instances
switch
instance-type virtual-switch;
interface ge-0/0/1.0;
bridge-domains
vlan100
domain-type bridge;
vlan-id 100;
vxlan
vni 100;
ingress-node-replication;
vlan200
domain-type bridge;
vlan-id 200;
vxlan
vni 200;
ingress-node-replication;
Then, we configure BGP EVPN to advertise all known VNIs. The
configuration is quite similar to the one we did with Quagga:
protocols
bgp
group fabric
type internal;
multihop;
family evpn signaling;
local-address 203.0.113.3;
neighbor 203.0.113.253;
neighbor 203.0.113.254;
routing-instances
switch
vtep-source-interface lo0.0;
route-distinguisher 203.0.113.3:1; #
vrf-import EVPN-VRF-VXLAN;
vrf-target
target:65000:1;
auto;
protocols
evpn
encapsulation vxlan;
extended-vni-list all;
multicast-mode ingress-replication;
routing-options
router-id 203.0.113.3;
autonomous-system 65000;
policy-options
policy-statement EVPN-VRF-VXLAN
then accept;
We also need a small compatibility patch for Cumulus
Quagga10.
The routes sent by this configuration are very similar to the routes
sent by Quagga. The main differences are:
- on JunOS, the route distinguisher is configured statically (in ), and
- on JunOS, the VNI is also encoded as an Ethernet tag ID.
Here is a type 3 route, as sent by JunOS:
> show route table bgp.evpn.0 receive-protocol bgp 203.0.113.3 extensive
bgp.evpn.0: 13 destinations, 13 routes (13 active, 0 holddown, 0 hidden)
* 3:203.0.113.3:1::100::203.0.113.3/304 IM (1 entry, 1 announced)
Accepted
Route Distinguisher: 203.0.113.3:1
Nexthop: 203.0.113.3
Localpref: 100
AS path: I
Communities: target:65000:268435556 encapsulation:vxlan(0x8)
PMSI: Flags 0x0: Label 6: Type INGRESS-REPLICATION 203.0.113.3
[...]
Here is a type 2 route:
> show route table bgp.evpn.0 receive-protocol bgp 203.0.113.3 extensive
bgp.evpn.0: 13 destinations, 13 routes (13 active, 0 holddown, 0 hidden)
* 2:203.0.113.3:1::200::50:54:33:00:00:0f/304 MAC/IP (1 entry, 1 announced)
Accepted
Route Distinguisher: 203.0.113.3:1
Route Label: 200
ESI: 00:00:00:00:00:00:00:00:00:00
Nexthop: 203.0.113.3
Localpref: 100
AS path: I
Communities: target:65000:268435656 encapsulation:vxlan(0x8)
[...]
We can check that the vMX is able to make sense of the routes it
receives from its peers running Quagga:
> show evpn database l2-domain-id 100
Instance: switch
VLAN DomainId MAC address Active source Timestamp IP address
100 50:54:33:00:00:0c 203.0.113.1 Apr 30 12:46:20
100 50:54:33:00:00:0d 203.0.113.2 Apr 30 12:32:42
100 50:54:33:00:00:0e 203.0.113.2 Apr 30 12:46:20
100 50:54:33:00:00:0f ge-0/0/1.0 Apr 30 12:45:55
On the other end, if we look at one of the Quagga-based VTEP, we can
check the received routes are correctly understood:
# show evpn vni 100
VNI: 100
VxLAN interface: vxlan100 ifIndex: 9 VTEP IP: 203.0.113.1
Remote VTEPs for this VNI:
203.0.113.3
203.0.113.2
Number of MACs (local and remote) known for this VNI: 4
Number of ARPs (IPv4 and IPv6, local and remote) known for this VNI: 0
# show evpn mac vni 100
Number of MACs (local and remote) known for this VNI: 4
MAC Type Intf/Remote VTEP VLAN
50:54:33:00:00:0c local eth1.100
50:54:33:00:00:0d remote 203.0.113.2
50:54:33:00:00:0e remote 203.0.113.2
50:54:33:00:00:0f remote 203.0.113.3
Get in touch if you have some success with other vendors!
-
For example, they may use bridges to connect containers
together.
-
Such a feature can replace proprietary
implementations of MC-LAG allowing several VTEPs to act as a
endpoint for a single link aggregation group. This is not needed
on our scenario where hypervisors act as VTEPs.
-
The development of Quagga is slow and closed . New
features are often stalled. FRR is placed under the umbrella of
the Linux Foundation, has a GitHub-centered development model and
an election process. It already has several interesting
enhancements (notably, BGP add-path, BGP unnumbered, MPLS and
LDP).
-
I am unenthusiastic about projects whose the sole purpose is to
rewrite something in Go. However, while being quite young, GoBGP
is quite valuable on its own (good architecture, good
performance).
-
The 48-port version is around $10,000 with the BGP license.
-
An empty chassis with a dual routing engine (RE-S-1800X4-16G) is around $30,000.
-
I don t know how pricey the vRR is. For evaluation purposes,
it can be downloaded for free if you are a customer.
-
The value 100 used in the route distinguishier
(
203.0.113.2:100) is not the one used to encode the VNI. The VNI
is encoded in the route target (65000:268435556), in the 24
least signifiant bits (268435556 & 0xffffff equals 100). As
long as VNIs are unique, we don t have to understand those
details.
-
For some reason, the use of a virtual switch is
mandatory. This is specific to this platform: a QFX doesn t
require this.
-
The encoding of the VNI into the route target is being
standardized in draft-ietf-bess-evpn-overlay. Juniper already
implements this draft.
# show evpn vni Number of VNIs: 2 VNI VxLAN IF VTEP IP # MACs # ARPs Remote VTEPs 100 vxlan100 203.0.113.2 4 0 203.0.113.3 203.0.113.1 200 vxlan200 203.0.113.2 3 0 203.0.113.3 203.0.113.1
# show evpn mac vni 100 Number of MACs (local and remote) known for this VNI: 4 MAC Type Intf/Remote VTEP VLAN 50:54:33:00:00:09 remote 203.0.113.1 50:54:33:00:00:0a local eth1.100 50:54:33:00:00:0b local eth2.100 50:54:33:00:00:0c remote 203.0.113.3
bridge command:
# bridge fdb show dev vxlan100 grep dst 00:00:00:00:00:00 dst 203.0.113.1 self permanent 00:00:00:00:00:00 dst 203.0.113.3 self permanent 50:54:33:00:00:0c dst 203.0.113.3 self 50:54:33:00:00:09 dst 203.0.113.1 self
203.0.113.1 and 203.0.113.3)
and the two last ones are the translation of the type 2 routes.
Interoperability
One of the strength of BGP EVPN is the interoperability with other
network vendors. To demonstrate it works as expected, we will
configure a Juniper vMX to act as a VTEP.
First, we need to configure the physical
bridge9. This is similar to the use of ip link and
brctl with Linux. We only configure one physical interface with two
old-school VLANs paired with matching VNIs.
interfaces
ge-0/0/1
unit 0
family bridge
interface-mode trunk;
vlan-id-list [ 100 200 ];
routing-instances
switch
instance-type virtual-switch;
interface ge-0/0/1.0;
bridge-domains
vlan100
domain-type bridge;
vlan-id 100;
vxlan
vni 100;
ingress-node-replication;
vlan200
domain-type bridge;
vlan-id 200;
vxlan
vni 200;
ingress-node-replication;
Then, we configure BGP EVPN to advertise all known VNIs. The
configuration is quite similar to the one we did with Quagga:
protocols
bgp
group fabric
type internal;
multihop;
family evpn signaling;
local-address 203.0.113.3;
neighbor 203.0.113.253;
neighbor 203.0.113.254;
routing-instances
switch
vtep-source-interface lo0.0;
route-distinguisher 203.0.113.3:1; #
vrf-import EVPN-VRF-VXLAN;
vrf-target
target:65000:1;
auto;
protocols
evpn
encapsulation vxlan;
extended-vni-list all;
multicast-mode ingress-replication;
routing-options
router-id 203.0.113.3;
autonomous-system 65000;
policy-options
policy-statement EVPN-VRF-VXLAN
then accept;
We also need a small compatibility patch for Cumulus
Quagga10.
The routes sent by this configuration are very similar to the routes
sent by Quagga. The main differences are:
- on JunOS, the route distinguisher is configured statically (in ), and
- on JunOS, the VNI is also encoded as an Ethernet tag ID.
Here is a type 3 route, as sent by JunOS:
> show route table bgp.evpn.0 receive-protocol bgp 203.0.113.3 extensive
bgp.evpn.0: 13 destinations, 13 routes (13 active, 0 holddown, 0 hidden)
* 3:203.0.113.3:1::100::203.0.113.3/304 IM (1 entry, 1 announced)
Accepted
Route Distinguisher: 203.0.113.3:1
Nexthop: 203.0.113.3
Localpref: 100
AS path: I
Communities: target:65000:268435556 encapsulation:vxlan(0x8)
PMSI: Flags 0x0: Label 6: Type INGRESS-REPLICATION 203.0.113.3
[...]
Here is a type 2 route:
> show route table bgp.evpn.0 receive-protocol bgp 203.0.113.3 extensive
bgp.evpn.0: 13 destinations, 13 routes (13 active, 0 holddown, 0 hidden)
* 2:203.0.113.3:1::200::50:54:33:00:00:0f/304 MAC/IP (1 entry, 1 announced)
Accepted
Route Distinguisher: 203.0.113.3:1
Route Label: 200
ESI: 00:00:00:00:00:00:00:00:00:00
Nexthop: 203.0.113.3
Localpref: 100
AS path: I
Communities: target:65000:268435656 encapsulation:vxlan(0x8)
[...]
We can check that the vMX is able to make sense of the routes it
receives from its peers running Quagga:
> show evpn database l2-domain-id 100
Instance: switch
VLAN DomainId MAC address Active source Timestamp IP address
100 50:54:33:00:00:0c 203.0.113.1 Apr 30 12:46:20
100 50:54:33:00:00:0d 203.0.113.2 Apr 30 12:32:42
100 50:54:33:00:00:0e 203.0.113.2 Apr 30 12:46:20
100 50:54:33:00:00:0f ge-0/0/1.0 Apr 30 12:45:55
On the other end, if we look at one of the Quagga-based VTEP, we can
check the received routes are correctly understood:
# show evpn vni 100
VNI: 100
VxLAN interface: vxlan100 ifIndex: 9 VTEP IP: 203.0.113.1
Remote VTEPs for this VNI:
203.0.113.3
203.0.113.2
Number of MACs (local and remote) known for this VNI: 4
Number of ARPs (IPv4 and IPv6, local and remote) known for this VNI: 0
# show evpn mac vni 100
Number of MACs (local and remote) known for this VNI: 4
MAC Type Intf/Remote VTEP VLAN
50:54:33:00:00:0c local eth1.100
50:54:33:00:00:0d remote 203.0.113.2
50:54:33:00:00:0e remote 203.0.113.2
50:54:33:00:00:0f remote 203.0.113.3
Get in touch if you have some success with other vendors!
-
For example, they may use bridges to connect containers
together.
-
Such a feature can replace proprietary
implementations of MC-LAG allowing several VTEPs to act as a
endpoint for a single link aggregation group. This is not needed
on our scenario where hypervisors act as VTEPs.
-
The development of Quagga is slow and closed . New
features are often stalled. FRR is placed under the umbrella of
the Linux Foundation, has a GitHub-centered development model and
an election process. It already has several interesting
enhancements (notably, BGP add-path, BGP unnumbered, MPLS and
LDP).
-
I am unenthusiastic about projects whose the sole purpose is to
rewrite something in Go. However, while being quite young, GoBGP
is quite valuable on its own (good architecture, good
performance).
-
The 48-port version is around $10,000 with the BGP license.
-
An empty chassis with a dual routing engine (RE-S-1800X4-16G) is around $30,000.
-
I don t know how pricey the vRR is. For evaluation purposes,
it can be downloaded for free if you are a customer.
-
The value 100 used in the route distinguishier
(
203.0.113.2:100) is not the one used to encode the VNI. The VNI
is encoded in the route target (65000:268435556), in the 24
least signifiant bits (268435556 & 0xffffff equals 100). As
long as VNIs are unique, we don t have to understand those
details.
-
For some reason, the use of a virtual switch is
mandatory. This is specific to this platform: a QFX doesn t
require this.
-
The encoding of the VNI into the route target is being
standardized in draft-ietf-bess-evpn-overlay. Juniper already
implements this draft.
interfaces ge-0/0/1 unit 0 family bridge interface-mode trunk; vlan-id-list [ 100 200 ]; routing-instances switch instance-type virtual-switch; interface ge-0/0/1.0; bridge-domains vlan100 domain-type bridge; vlan-id 100; vxlan vni 100; ingress-node-replication; vlan200 domain-type bridge; vlan-id 200; vxlan vni 200; ingress-node-replication;
protocols bgp group fabric type internal; multihop; family evpn signaling; local-address 203.0.113.3; neighbor 203.0.113.253; neighbor 203.0.113.254; routing-instances switch vtep-source-interface lo0.0; route-distinguisher 203.0.113.3:1; # vrf-import EVPN-VRF-VXLAN; vrf-target target:65000:1; auto; protocols evpn encapsulation vxlan; extended-vni-list all; multicast-mode ingress-replication; routing-options router-id 203.0.113.3; autonomous-system 65000; policy-options policy-statement EVPN-VRF-VXLAN then accept;
> show route table bgp.evpn.0 receive-protocol bgp 203.0.113.3 extensive bgp.evpn.0: 13 destinations, 13 routes (13 active, 0 holddown, 0 hidden) * 3:203.0.113.3:1::100::203.0.113.3/304 IM (1 entry, 1 announced) Accepted Route Distinguisher: 203.0.113.3:1 Nexthop: 203.0.113.3 Localpref: 100 AS path: I Communities: target:65000:268435556 encapsulation:vxlan(0x8) PMSI: Flags 0x0: Label 6: Type INGRESS-REPLICATION 203.0.113.3 [...]
> show route table bgp.evpn.0 receive-protocol bgp 203.0.113.3 extensive bgp.evpn.0: 13 destinations, 13 routes (13 active, 0 holddown, 0 hidden) * 2:203.0.113.3:1::200::50:54:33:00:00:0f/304 MAC/IP (1 entry, 1 announced) Accepted Route Distinguisher: 203.0.113.3:1 Route Label: 200 ESI: 00:00:00:00:00:00:00:00:00:00 Nexthop: 203.0.113.3 Localpref: 100 AS path: I Communities: target:65000:268435656 encapsulation:vxlan(0x8) [...]
> show evpn database l2-domain-id 100 Instance: switch VLAN DomainId MAC address Active source Timestamp IP address 100 50:54:33:00:00:0c 203.0.113.1 Apr 30 12:46:20 100 50:54:33:00:00:0d 203.0.113.2 Apr 30 12:32:42 100 50:54:33:00:00:0e 203.0.113.2 Apr 30 12:46:20 100 50:54:33:00:00:0f ge-0/0/1.0 Apr 30 12:45:55
# show evpn vni 100 VNI: 100 VxLAN interface: vxlan100 ifIndex: 9 VTEP IP: 203.0.113.1 Remote VTEPs for this VNI: 203.0.113.3 203.0.113.2 Number of MACs (local and remote) known for this VNI: 4 Number of ARPs (IPv4 and IPv6, local and remote) known for this VNI: 0 # show evpn mac vni 100 Number of MACs (local and remote) known for this VNI: 4 MAC Type Intf/Remote VTEP VLAN 50:54:33:00:00:0c local eth1.100 50:54:33:00:00:0d remote 203.0.113.2 50:54:33:00:00:0e remote 203.0.113.2 50:54:33:00:00:0f remote 203.0.113.3
- For example, they may use bridges to connect containers together.
- Such a feature can replace proprietary implementations of MC-LAG allowing several VTEPs to act as a endpoint for a single link aggregation group. This is not needed on our scenario where hypervisors act as VTEPs.
- The development of Quagga is slow and closed . New features are often stalled. FRR is placed under the umbrella of the Linux Foundation, has a GitHub-centered development model and an election process. It already has several interesting enhancements (notably, BGP add-path, BGP unnumbered, MPLS and LDP).
- I am unenthusiastic about projects whose the sole purpose is to rewrite something in Go. However, while being quite young, GoBGP is quite valuable on its own (good architecture, good performance).
- The 48-port version is around $10,000 with the BGP license.
- An empty chassis with a dual routing engine (RE-S-1800X4-16G) is around $30,000.
- I don t know how pricey the vRR is. For evaluation purposes, it can be downloaded for free if you are a customer.
-
The value 100 used in the route distinguishier
(
203.0.113.2:100) is not the one used to encode the VNI. The VNI is encoded in the route target (65000:268435556), in the 24 least signifiant bits (268435556 & 0xffffffequals100). As long as VNIs are unique, we don t have to understand those details. - For some reason, the use of a virtual switch is mandatory. This is specific to this platform: a QFX doesn t require this.
- The encoding of the VNI into the route target is being standardized in draft-ietf-bess-evpn-overlay. Juniper already implements this draft.
 To illustrate our examples, we use the following setup:
 The
The ")
 The main expectation of such a setup is that while the virtual hosts
should be able to use resources from the public network, they should
not be able to access resources from the infrastructure network
(including resources hosted on the hypervisor itself, like a
The main expectation of such a setup is that while the virtual hosts
should be able to use resources from the public network, they should
not be able to access resources from the infrastructure network
(including resources hosted on the hypervisor itself, like a 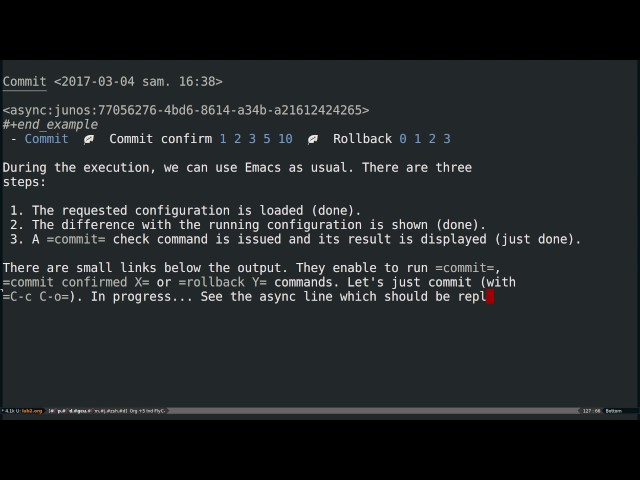

 Recently

 What happened in the

 The random gaps (
 With a